
Wes_R + GT-R [120 pics]


Thread Starter
Newbie
Joined: Feb 2009
Posts: 2
Wes_R + GT-R [120 pics]
I honestly don't know how to start this so let's just get straight into it.
So I was contacted initially for advice on how to deal with the swirls with the Porter Cable, Optimum Polishes, and some Lake Country Pads but along the conversation when I mentioned how long it would take we just decided that I would take it on. Problem now was it was gonna be a 2 week wait cause I was already booked up and the anticipation was killing me, I was really excited to spend time with godzilla.
Upon the GT-Rs arrival I had a chance to properly inspect the paint with my Sun Gun. At first in my mind I honestly thought that just a 1 step or 2 step polish at the most would be needed but taking a closer shocked look I realized that this was gonna need a full paint correction.
Anyway, here we go hopefully you guys enjoy the pics and possibly catch some tips.
Lets start with the basics. I don't approach a vehicle with anything on my clothing that could accidently scratch the car for example zippers, a belt buckle, watch, rings, etc.
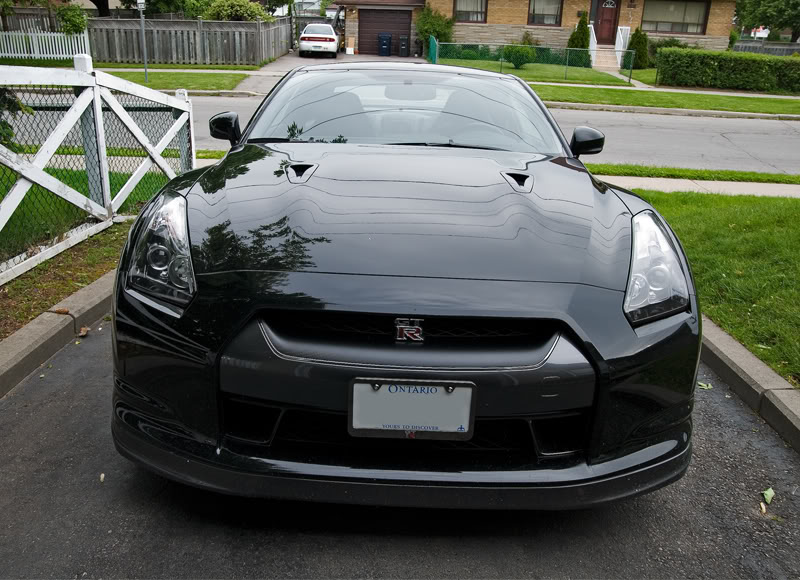
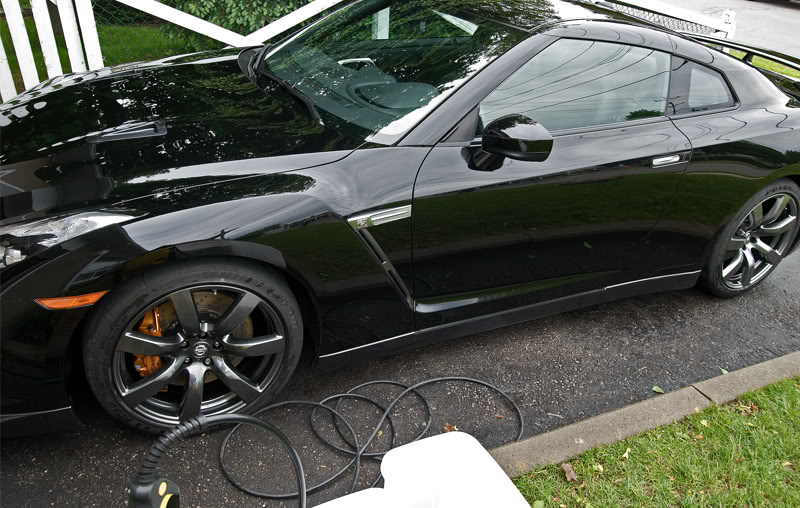
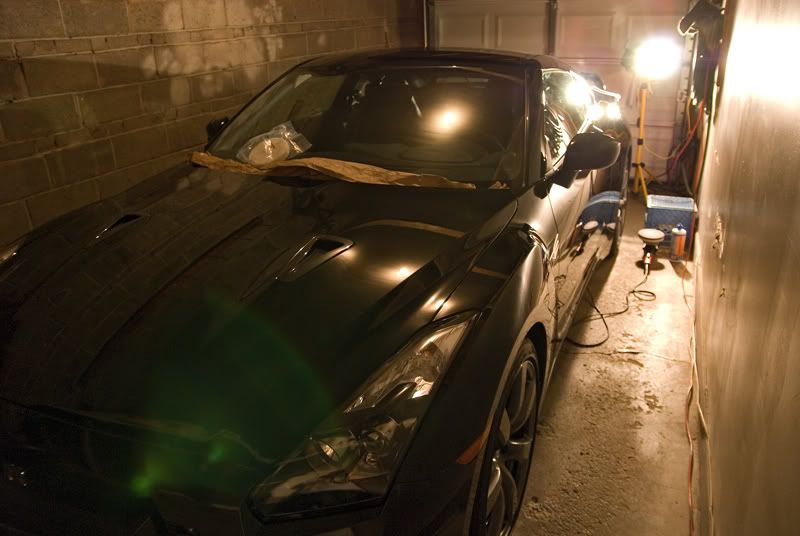
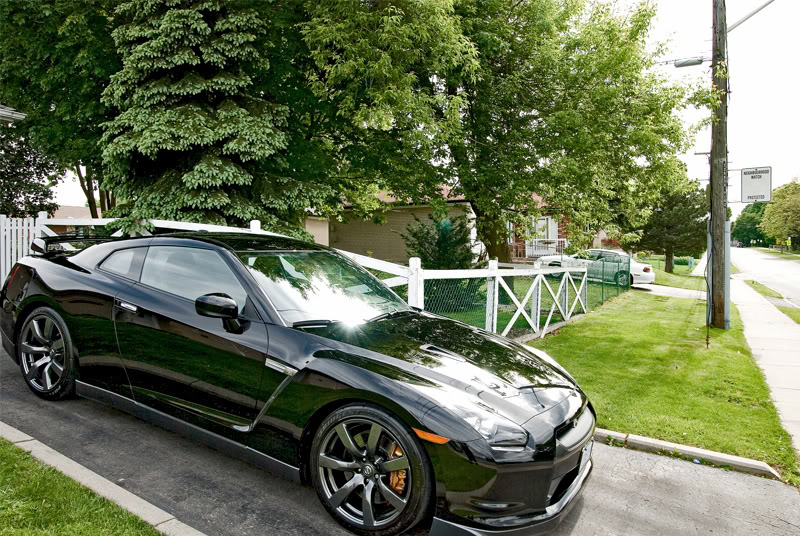
Got in and backed it out.
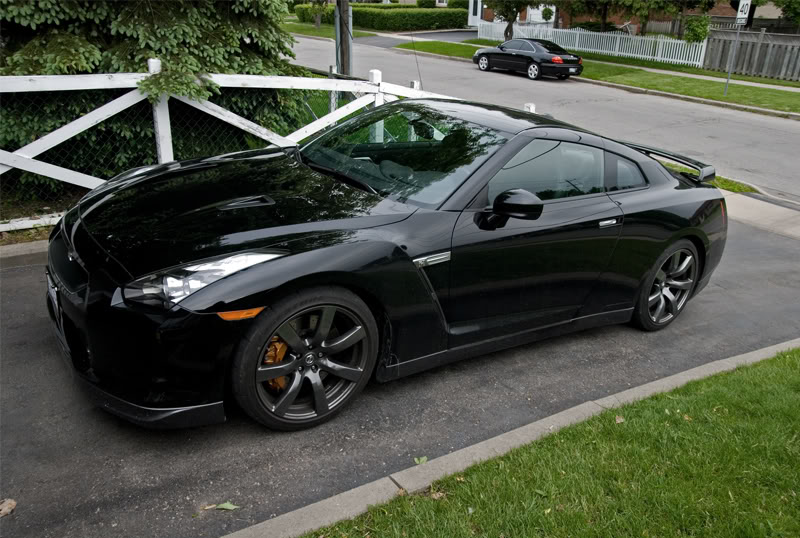
And here she is.
My routine is to start with the wheels and engine generally because if you have already washed the car and then have to do either you will get the car dirty all over again.
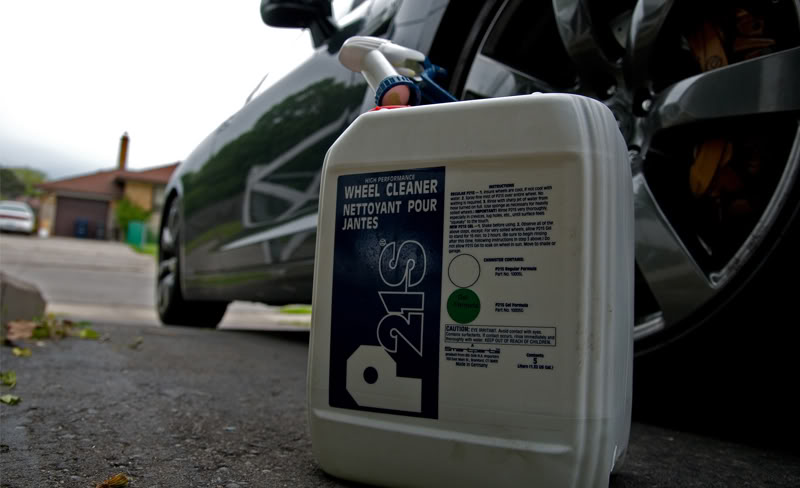
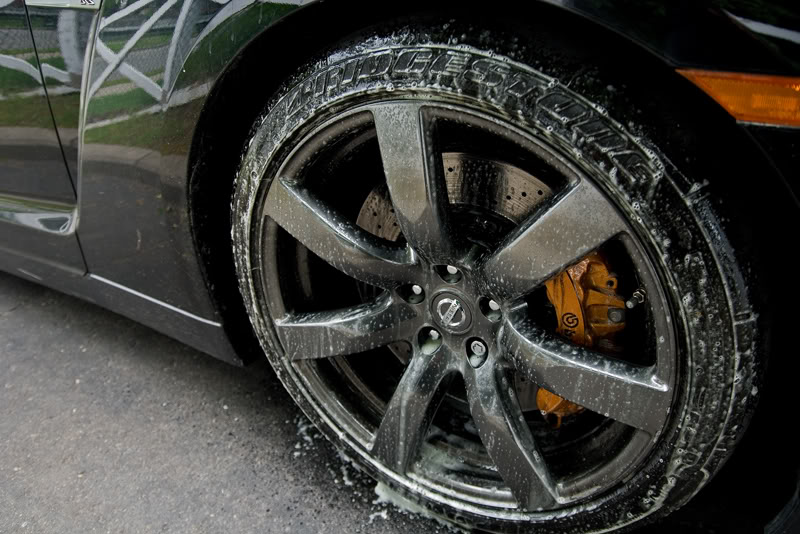
Sprayed p21s Wheel Gel on the rims and tires. What's great about this wheel cleaner is it is non-acidic, meaning if you got ceramic brakes they won't damage them as say an acid based wheel cleaner would.
Let those soak and sprayed Meguiars All Purpose Cleaner cut 50/50 with water into the wheel well and let those sit and eat into the grime while I moved onto the engine.
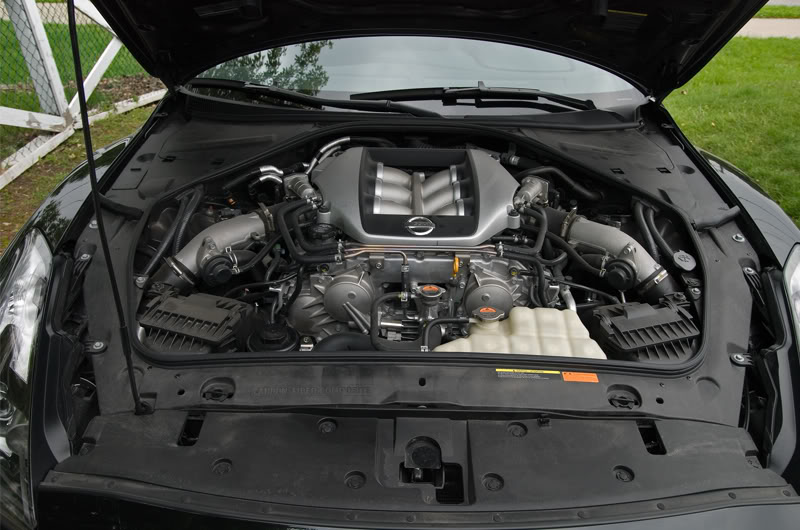
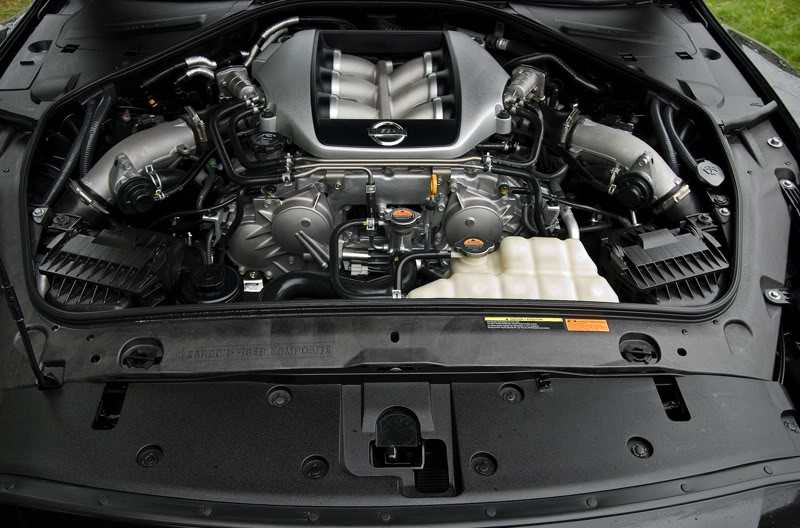
Engine was not to bad at all just dusty at the most so nothing hardcore here other then a Meguiars All Purpose Cleaner spray, light rinse off, a blow dry with my Chemical Guy's Blow Dryer, and then dressed it with Meguiars Hyper Dressing cut 25/75 water. Turned on the engine and let the engine warm up for about 10 minutes or so.
Before
After
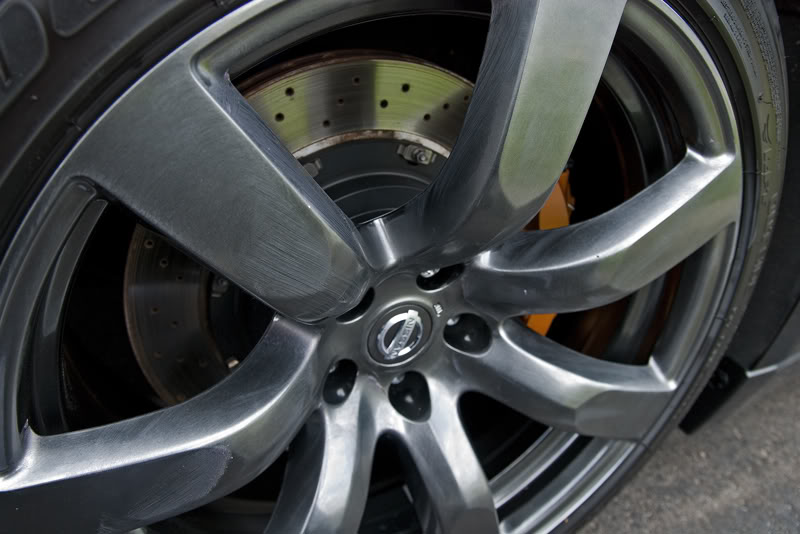
Now addressed the wheels with my E-Z Brush which is pretty cool cause it can be bent so that you can get it into different places. I really love the way these 2 pics with the E-Z Brush turned out!
Now this is what the rim should look like after using the brush properly.

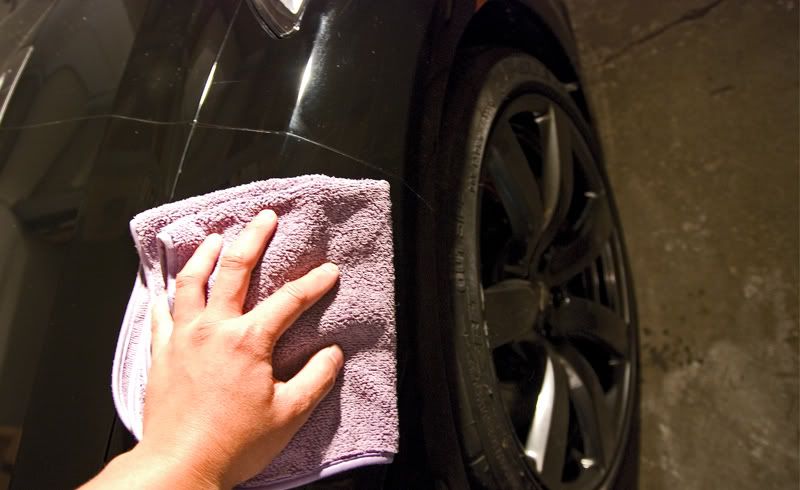
Did the rim face with a microfibre mitt solely dedicated for the rims, which I prefer cause on those stubborn spots I can really apply some hard pressure.
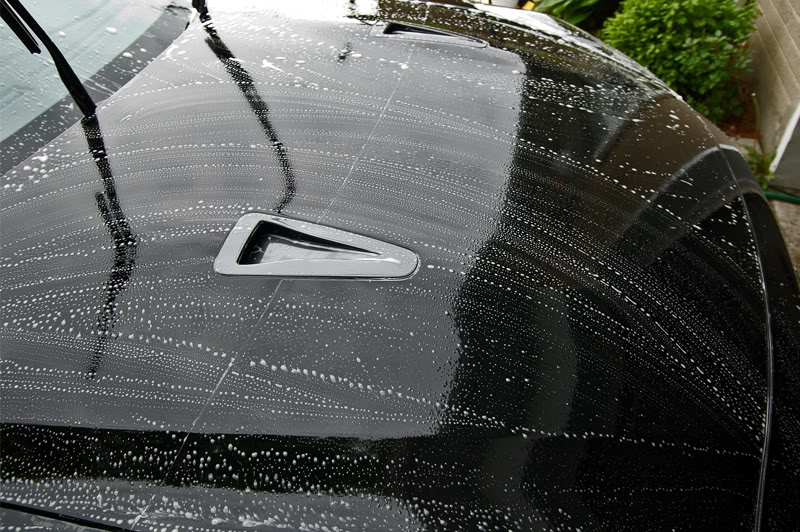
Finally after all of that on to the washing. Chemical Guys Citrus Wash + Gloss was the car soap cut to strip anything that may have been on the car's surface(wax), I forget the ratio to be honest.
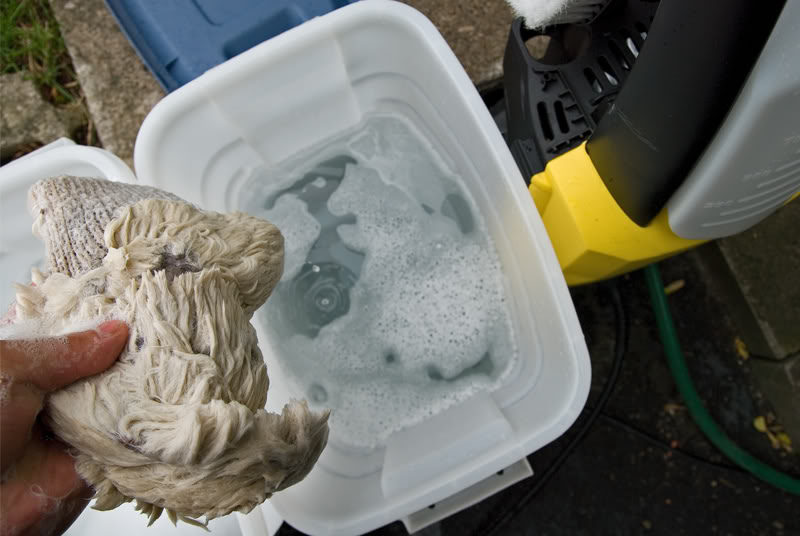
Two Bucket Method. One soapy water the other just water for rinsing so you don't contaminate the soapy water with dirt.
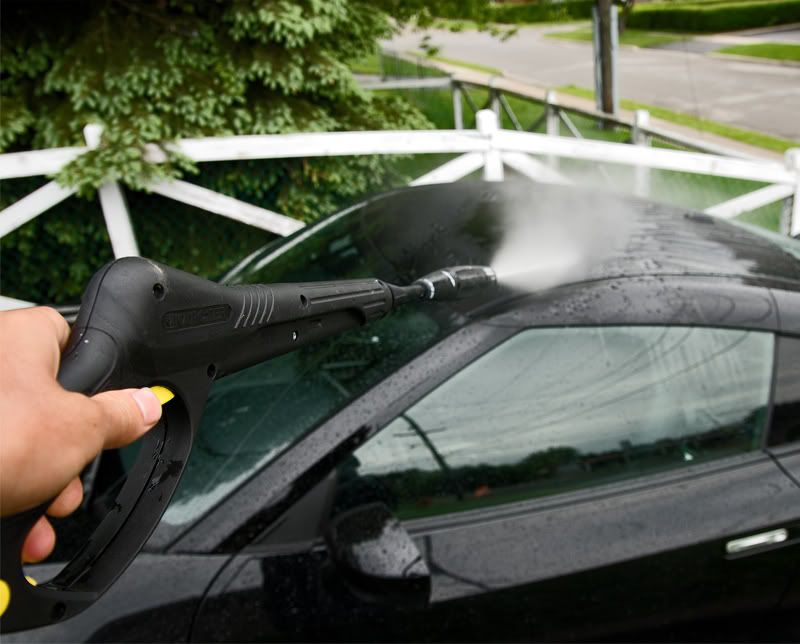
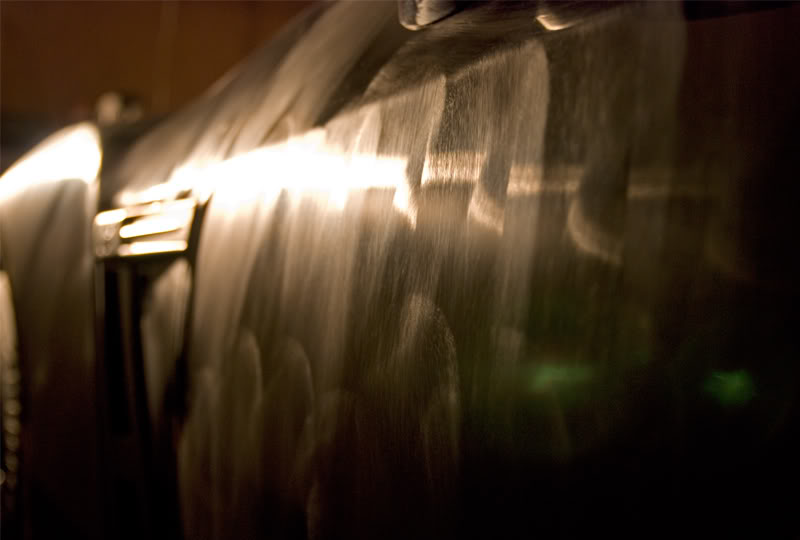
Started rinsing off the car to wash off as much as I could of any loose debris. Bottom line the less dirt on your car when you start washing means that there will be less dirt that may get potentially dragged on the paint causing swirls.
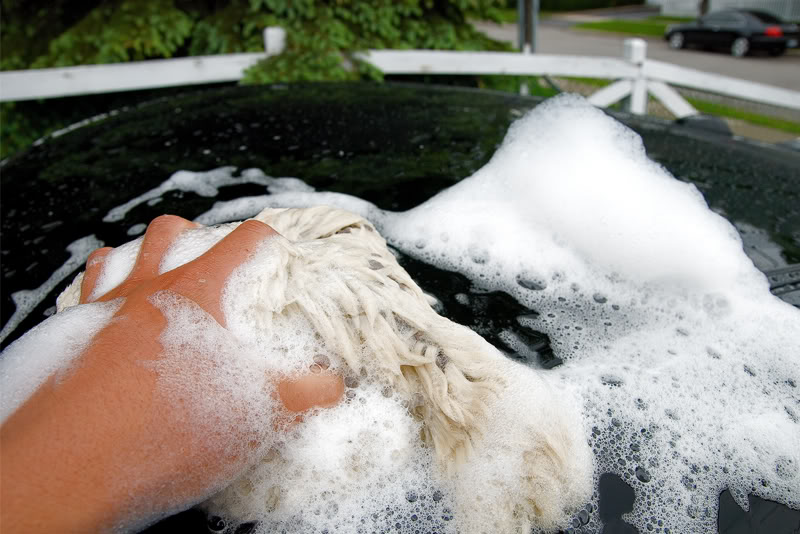
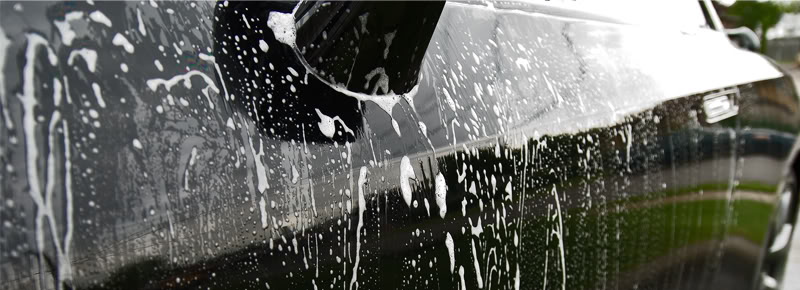
Sheepskin wash mitt this time starting with the roof.
After each panel or even half a panel you should be rinsing off your mitt in the water only bucket. The reason you do this is because you do not want to be using one bucket and dragging that same dirt filled water all over the paint causing swirls. Common sense and pretty simple no, but surprisingly people don't do it. Also you may have to rinse along as you go cause this will make washing a little longer.
Also forgive me for not being able to explain this next part it is just habit now already that I learnt years ago but hopefully someone can cover for me. All panels facing the sky should be done back and forth like in this pic hopefully you can see the pattern of the suds.
And all side panels should be up and down. The bottom half should be saved for last as usually those sections are the dirtiest.
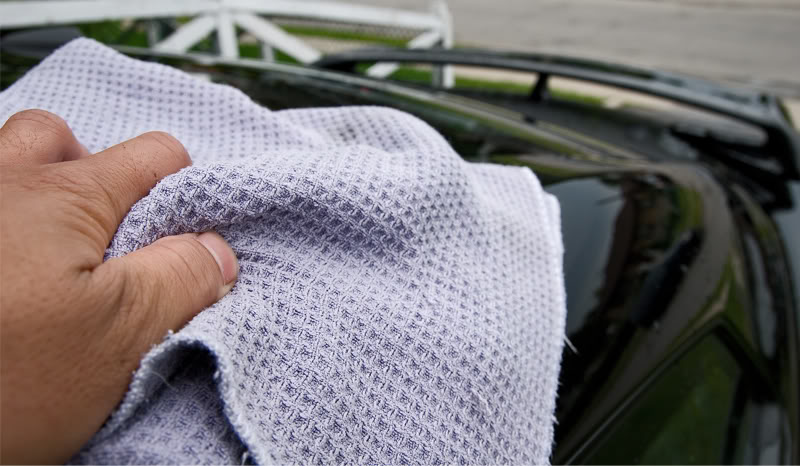
Did the final rinse down and dried the car using a waffle weave towel. These towels are far superior to a chamois because of a couple things, they absorb water alot faster, they have these pockets which dirt or dust blown on the car can escape into and not be dragged on the paint, and I could go on and on but you get the point if you have or get one I am sure you can find more things to appreciate about them.

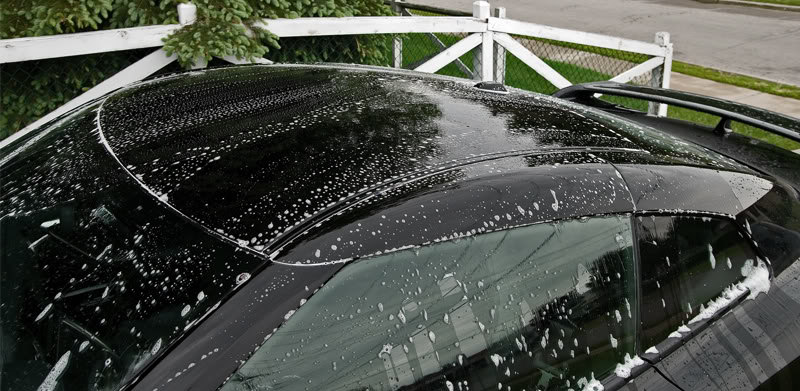
Finally finished. Some may think that shines nicely but I am not finished with this car yet.
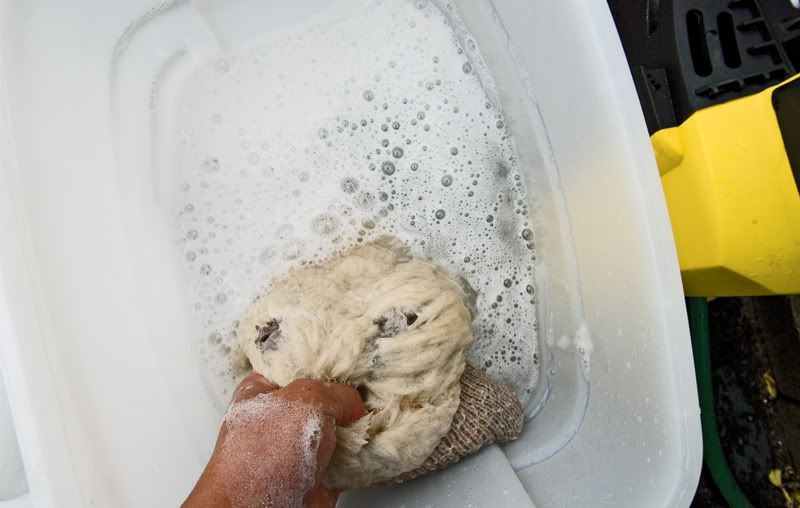
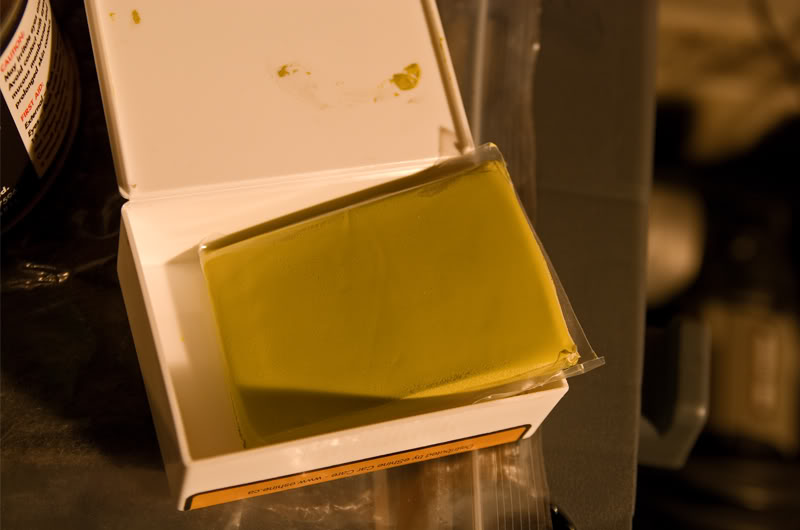
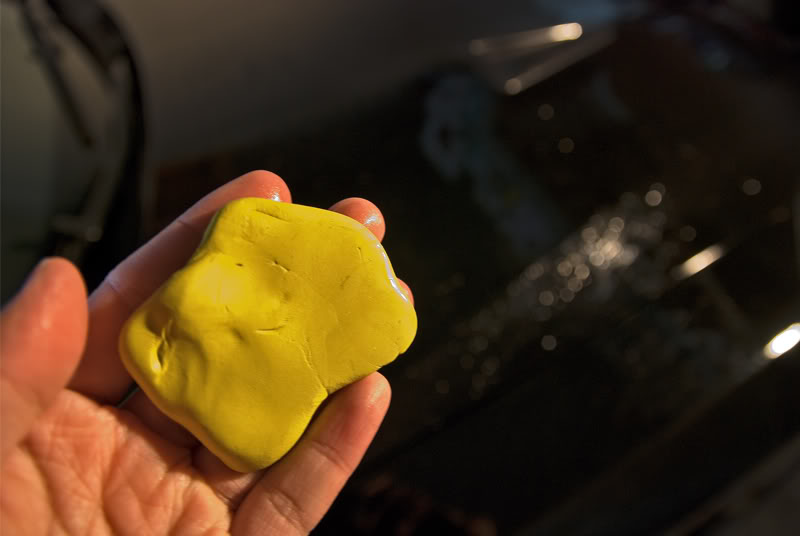
Pulled it into my garage and got ready to clay with Riccardo Clay yellow.
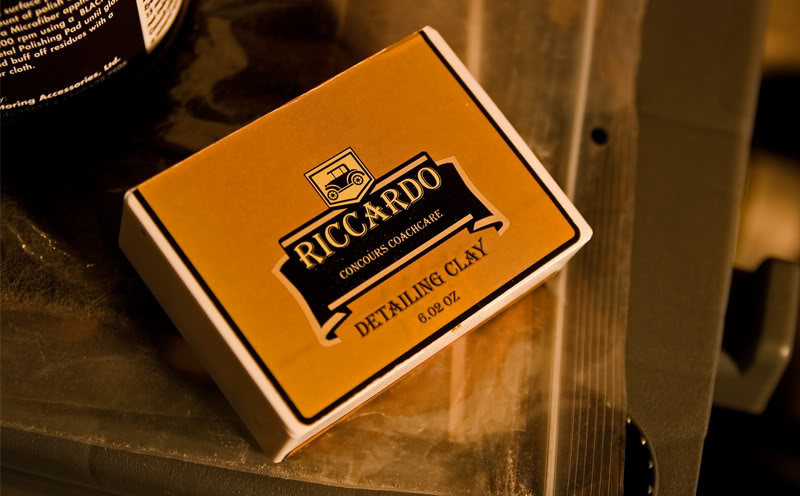
My last bar.
Now if your planning on claying your own car without any polishing involved and it is not a mild clay like Sonus Green Clay, you are gonna get clay bar marring but general proper clay bar procedure is to avoid the cold. What you can do is have something with high lubricity like Megiuars Last Touch cut 50/50 with warm water to help you out but sometimes it just can't be avoided.
Oh yeah and the reason you clay is because even though you have washed your car there are still tiny debris that get embedded into your clearcoat called surface contaminants that only a clay bar can sheer out. If after you wash your car and run your hand along the paint you will notice that it still feels rough(even new cars that get rail dust from being transported by train) but after a good clay bar only a baby's skin feels more smooth then your paint, honestly.
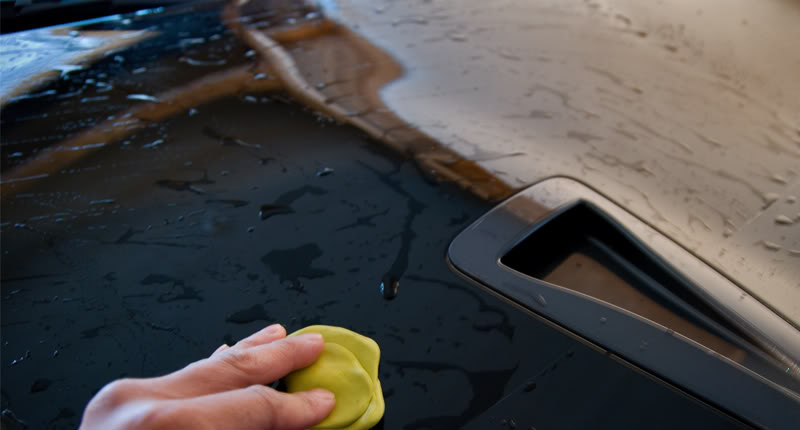
Started claying and it was not bad at all as expected but as usual some lower parts on the door were a little bad and the whole back end had quite a bit.
Claying the hood.
Nothing really.
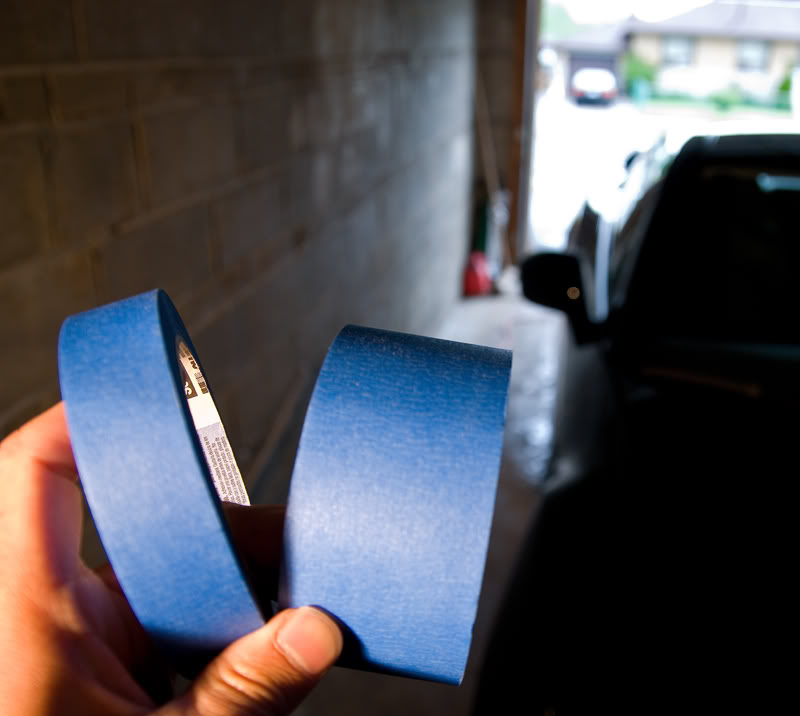
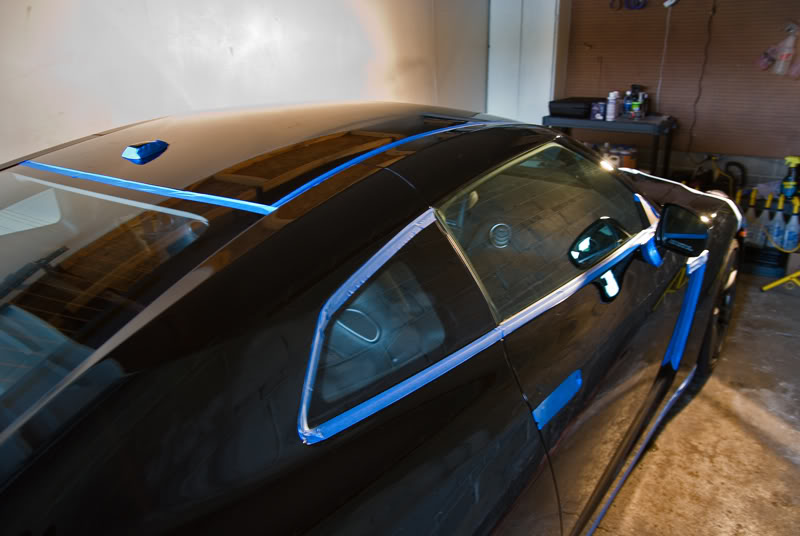
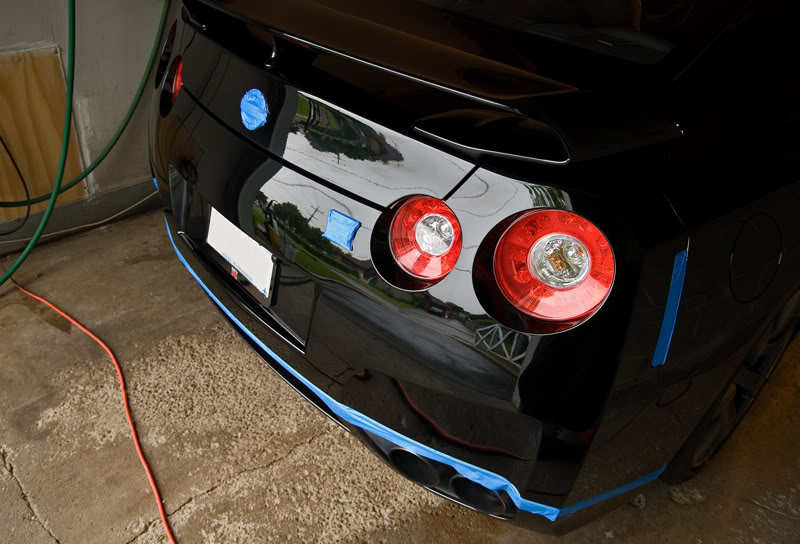
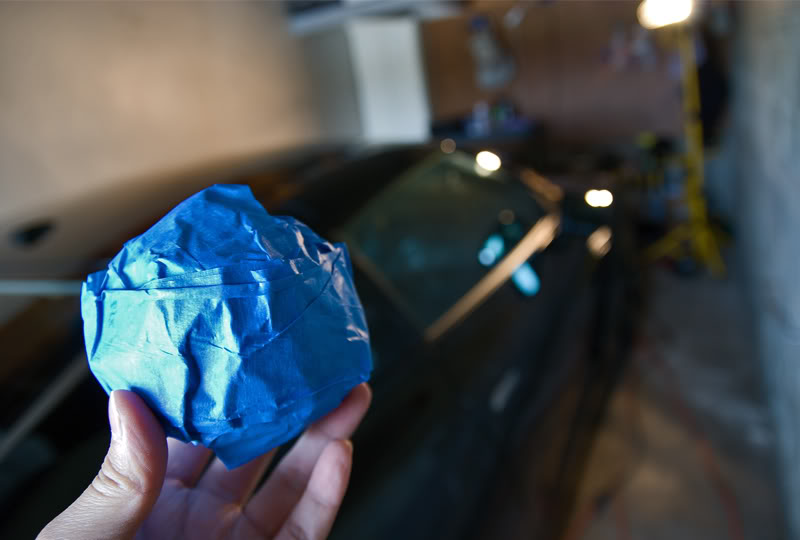
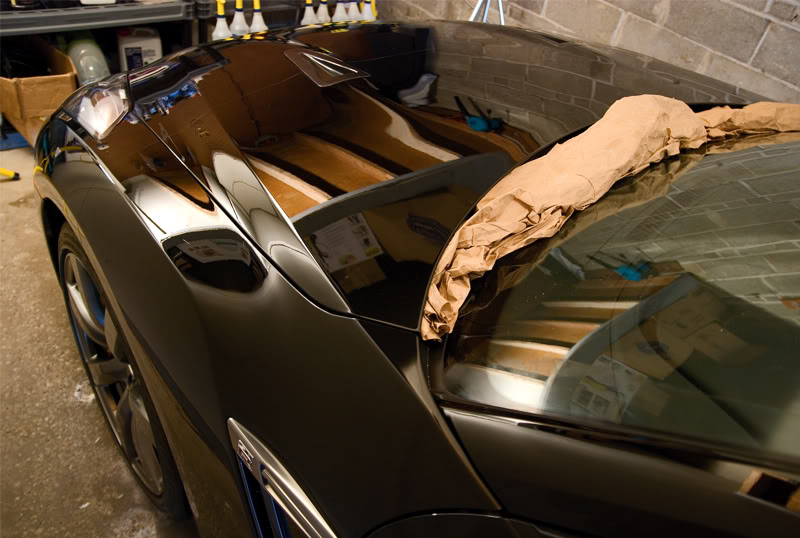
After the clay barring I want to mask the car with blue painters tape to protect rubber trim from being burnt. I like using two kinds of width.
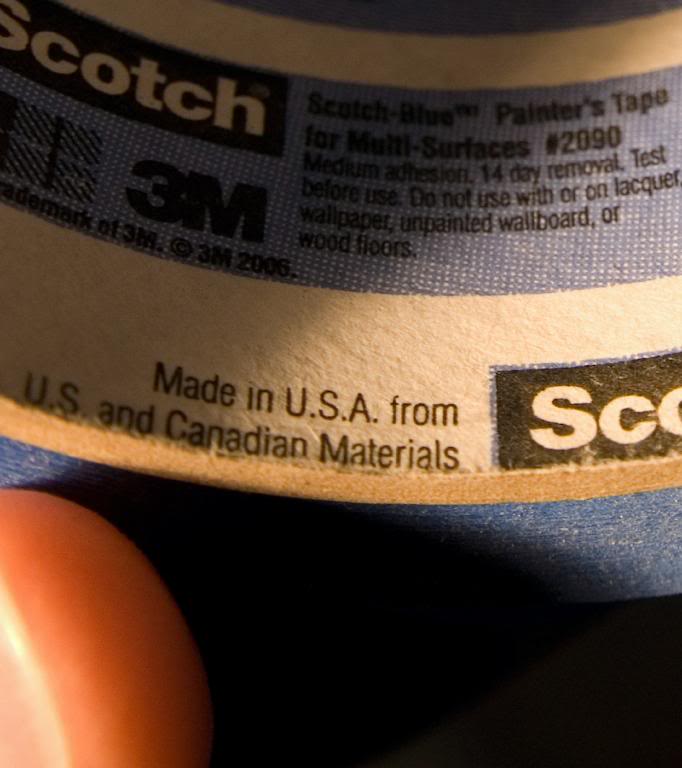
It's 3M tape and the product number is 2090 which is medium adhesion, nothing to strong.
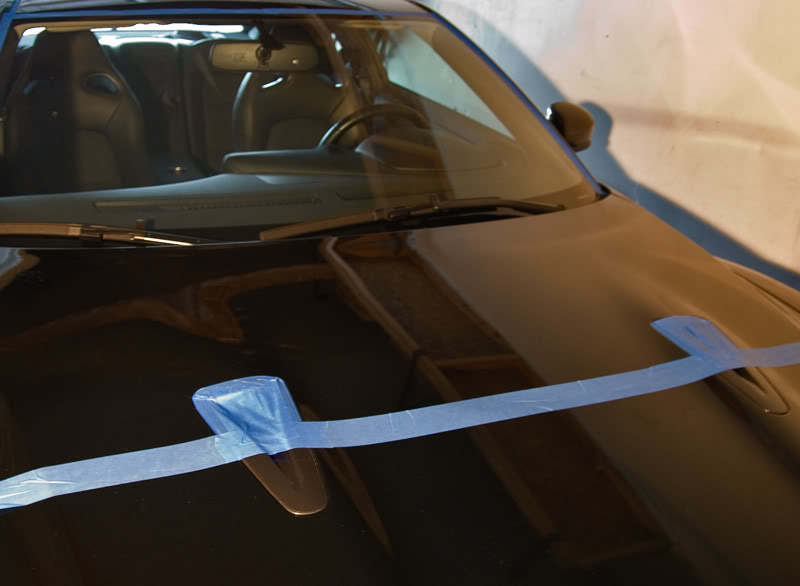
Here are some pics of the masking.
Put the thick tape over the edge of the clear bra.
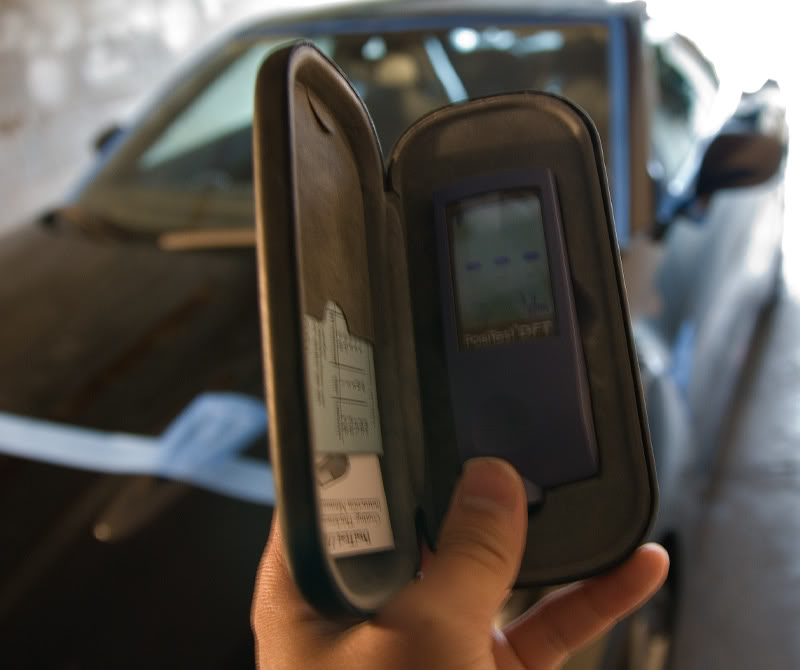
And now time to measure the paint with a paint thickness gauge for any possible low spots and also to report to the owner if any panels have been repainted(I never thought anything would be repainted here though but just to look out for low spots).
Measured the paint in microns which is a thousandth of a millimeter or .001 of a mm. Generally in my experience OEM is 100 to 130 microns.
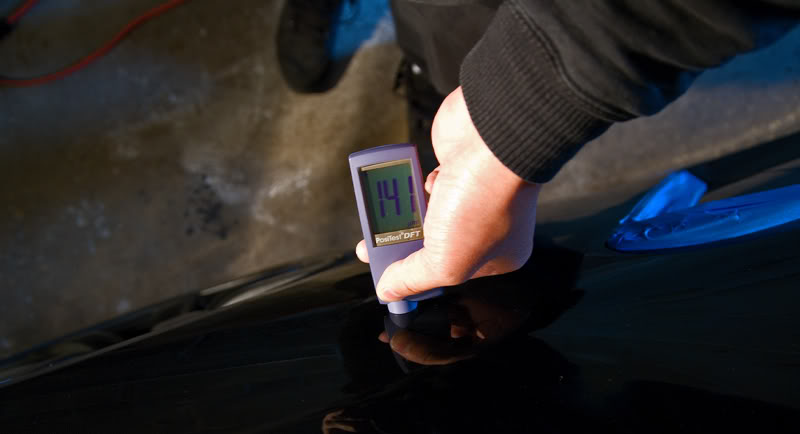
Measurements were looking healthy and very consistent around 140 more or less with maybe only 2 or 3 panels showing 130 or 150.
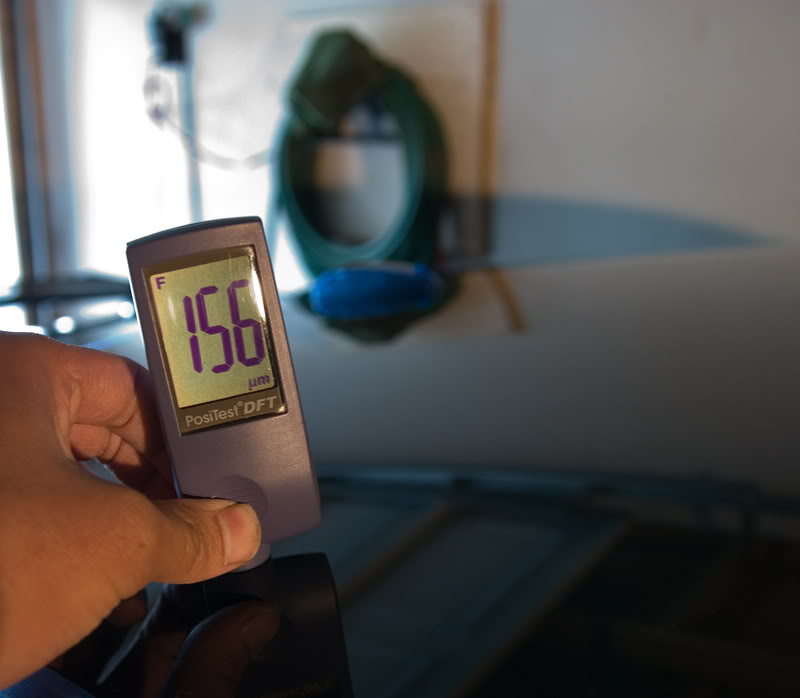
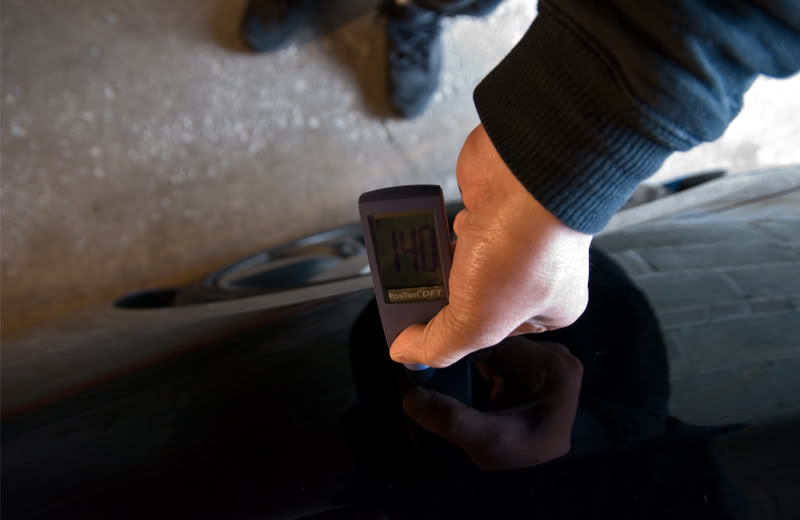
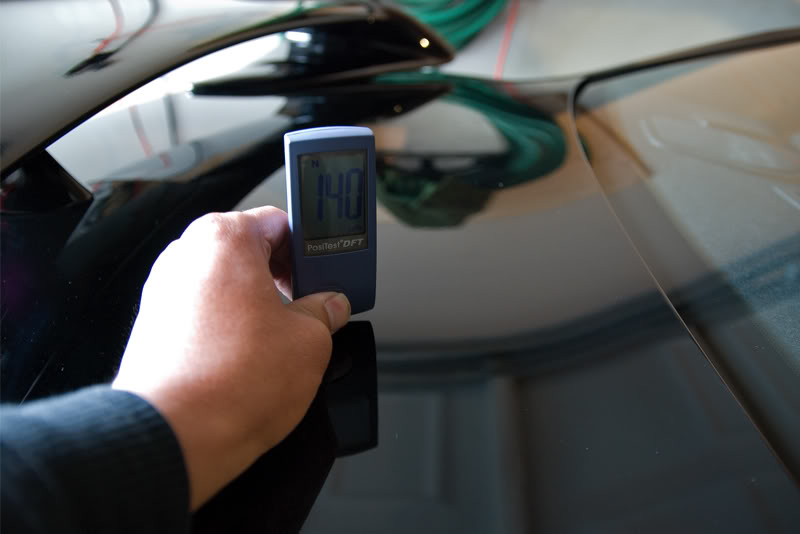
Even though I am only showing one measurement per panel what I am actually doing per panel is doing at least 10 more or less measurements. It's kind of weird but I kind of imagine the paint as a plain and imagine the different grooves of where it is high and low kind of like a field with hills.
Anyway with all the prep work finally out of the way we can now begin polishing. Imagine and no disrespect to anyone but if you go to a hack shop they just wash your car and get straight into polishing, it's kind of scary especially if you prize your car and have to leave it in their hands what is happening to your baby.
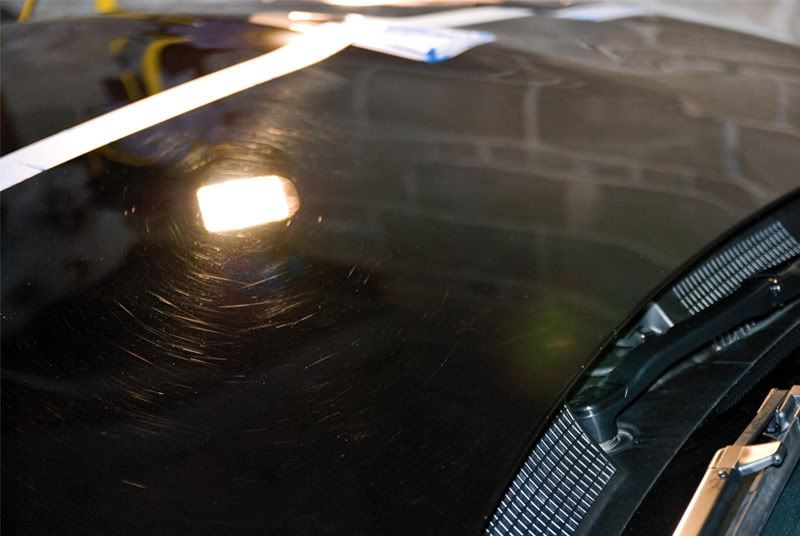
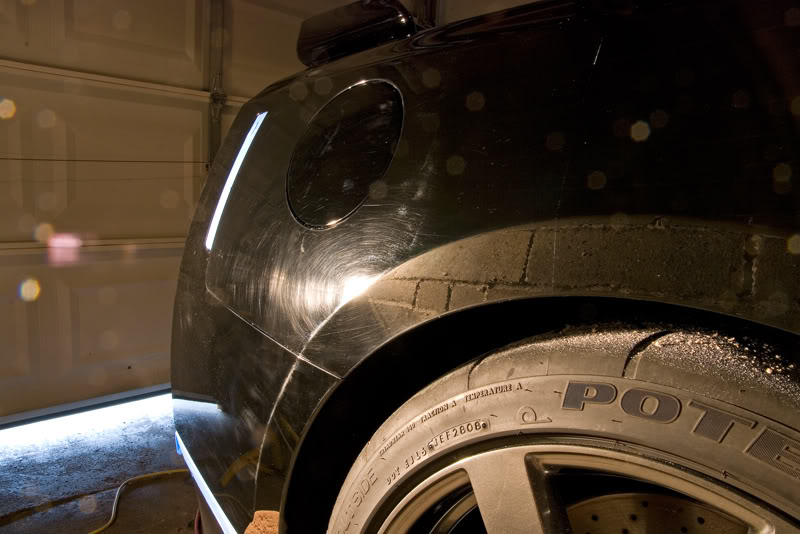
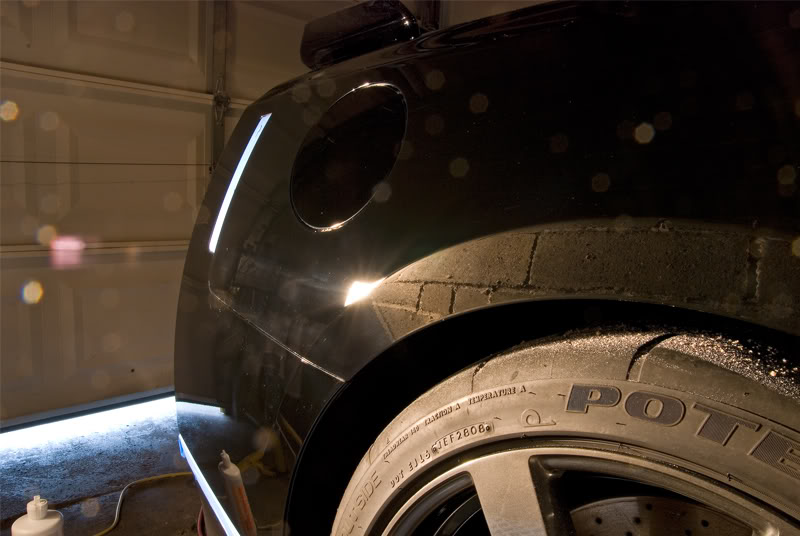
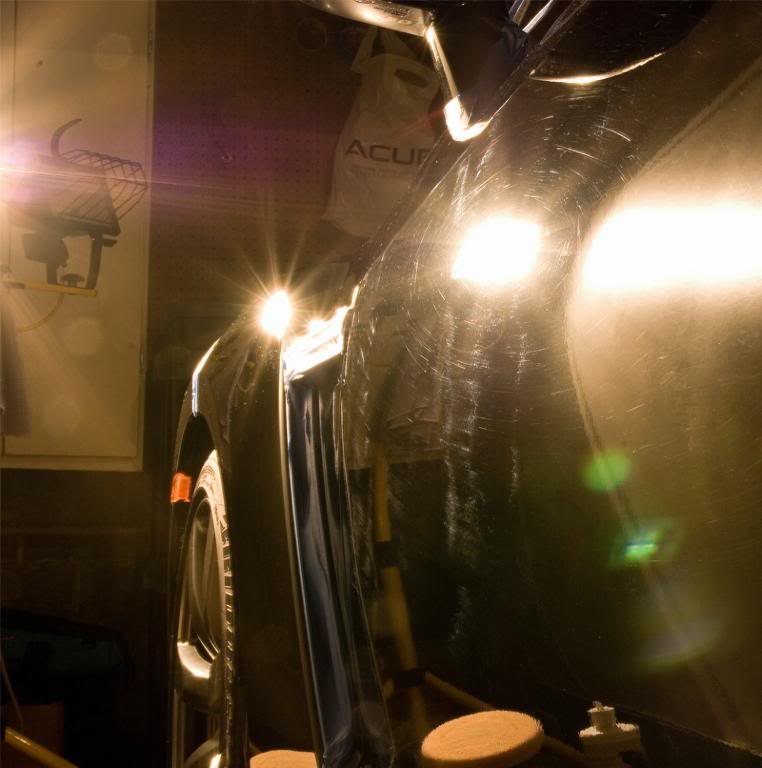
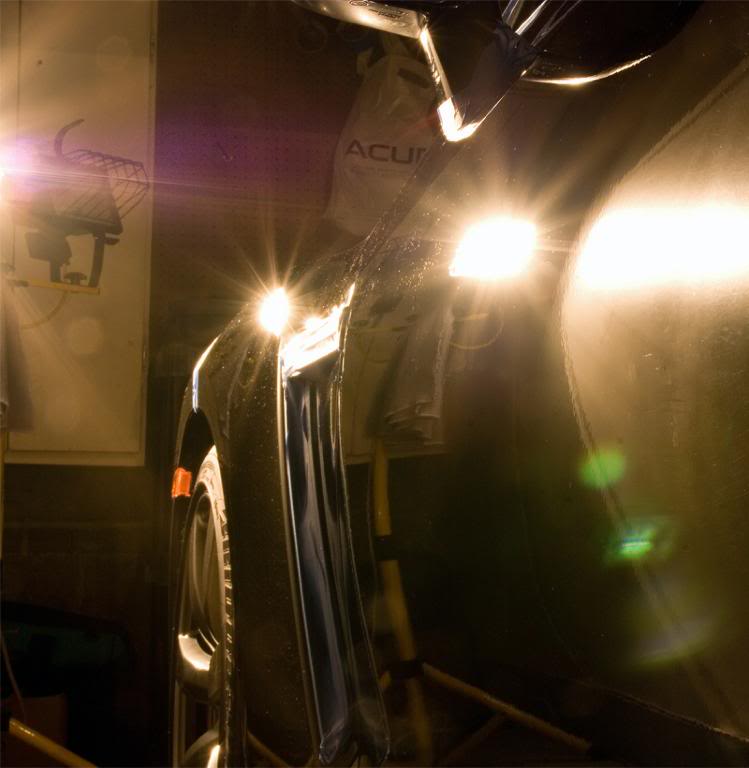
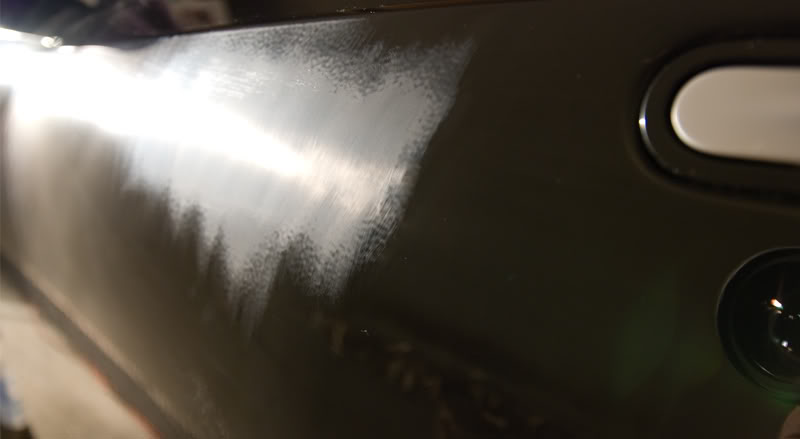
So back to things here is what I was pretty much dealing with under 500 watt halogen lighting.
I went straight into it with Menzerna Super Intensive Polish, a 6.5 orange Lake Country Pad, the Meguiars Solo Backing Plate, and the Makita Rotary.
I used the Zenith Point Technique where 5 beads the size of a skittle were spread out at 600rpm, broken down at 1200rpm, then polished until clear at around 1700rpm. Then back down the scale from 1700rpm to 1500rpm, and then refined at around 1100rpm over a 12 x 18 area.
Here are some before and afters.
Before
After

A 50/50 shot with the right side polished and the left side not.
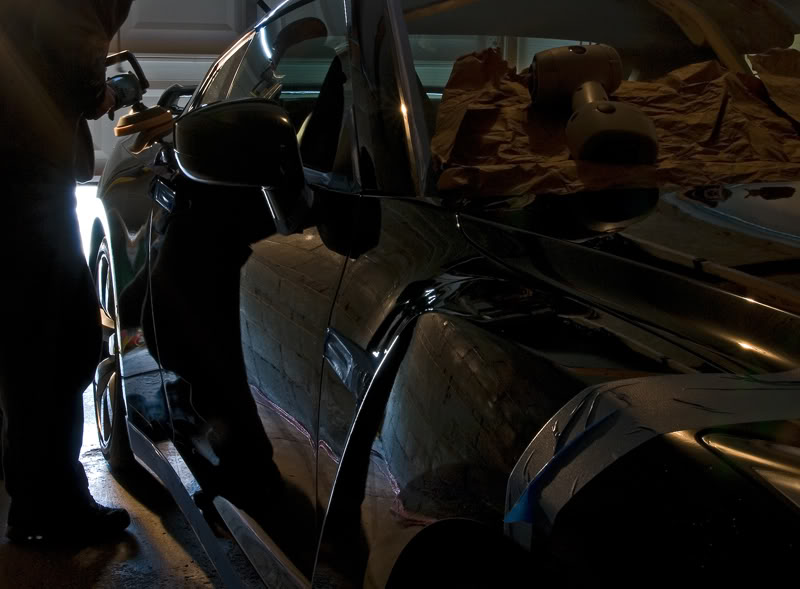
A shot of me polishing.
Before
After
Another 50/50
Before(this one was bad)
After
Before
After
Before(this one was pretty bad to)
After
Before
After
So after the cutting stage I also polished the tail lights as they had swirls on them as well but with a forced rotation dual action polisher(the new Flex 3401). Here are some before and afters.
Before
After
Before
After
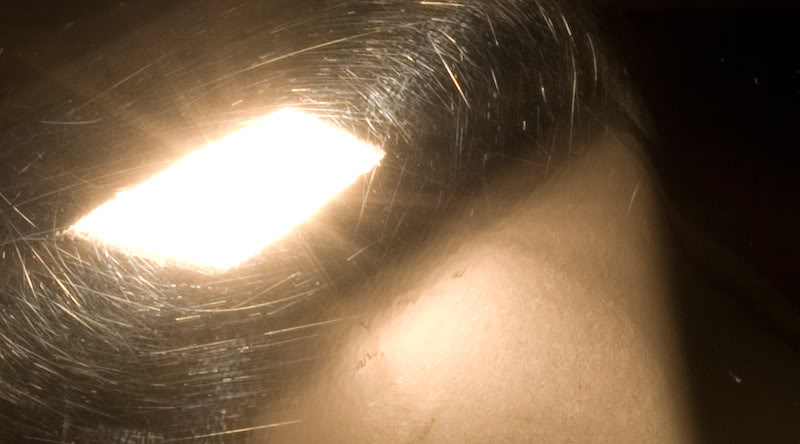
Now after all that was said and done the hard part comes. Chasing all what is called rds or rids random deep scratches or random isolated deep scratches by wetsanding. Now just a 2 step polish will get the paint in the 95% range more or less perfected(which is in my opinion perfectly fine for a daily driver) but deeper stuff will be left behind. How deep the scratches are varies some you can feel with your nail others you can't but with spot wetsanding you can either get them out completely or at the least round off the edges so that the sunlight is dispersed in a way to not make them so noticeable or not noticeable at all even though they may be there.
Now excuse me please because 1 this was very labour intensive and 2 my photography skills are not on a level to capture these fine scratches.
The process was to wetsand with either 2000 or 2500 grit then cross hatch sand with 3000 grit. Basically when you sand with either 2000 or 2500 grit you sand in the motion vertically then go back over with 3000 and go horizontally to cross hatch making polishing out the wetsanding marks easier.
Here is a rid.
Wetsanding it out.
And gone.
Here are some during shots. I honestly just wanted to get it done and spent a good couple hours going through this process.
Now with that tedious stage done I could finally jewel the paint, but first a couple things.
Unmask
Dust out the crevices.
And finally an alcohol wipe down. The reason you do this is because the polishes contain oils that can fill very very light scratches so the wipe down allows you to properly check your work.
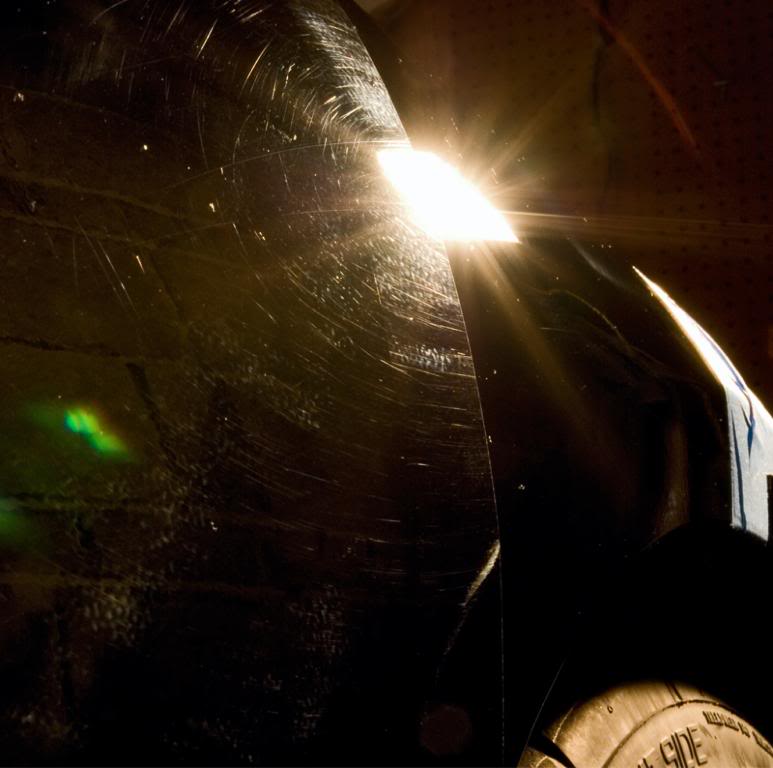
So alcohol cut 50/50 with water wiped on with a plush microfibre cloth, and a 3M Sun Gun were used to check my work.
The Sun Gun for those that don't know omits they same spectrum light as the sun and I believe is 99.3% similar. There are some reflections in the paint that may seem like something but are not.

Finally the last stage of polishing which is the jeweling or burnishing stage which is a very light cutting polish and light cutting pad which burnish the paint to a very high gloss(they don't do this at the factory).
Tools for this job were my new Flex 3401 which I have been dying to use and this is the first time, Menzerna P085RD, and a white Lake Country pad.
A during shot.
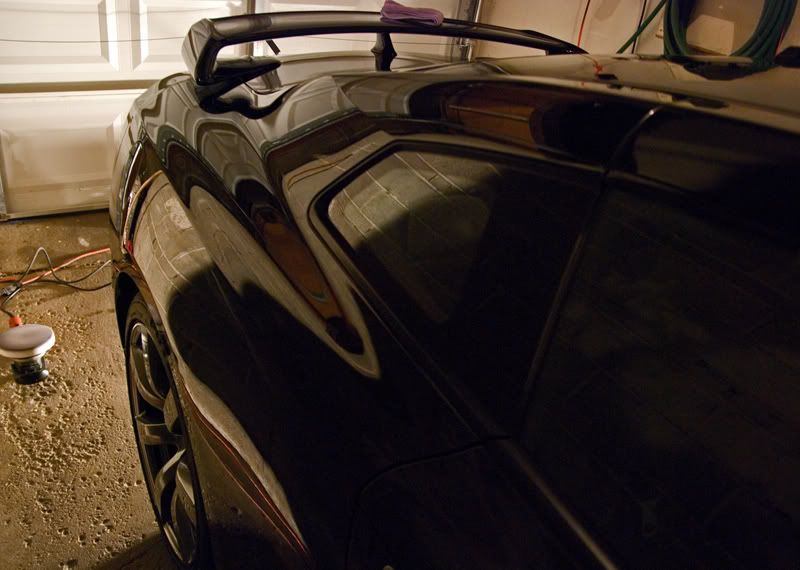
Some amazing reflection shots!
Look at the gloss and there isn't even a wax on yet.
After spending a couple hours refining the paint another alcohol wipe down was done not only to inspect for defects but to also create a clean surface for the wax to bond to.
Wax of the day was Swissvax Concorso. For dark colors a carnuba based wax gives on amazing glow but for light colored cars I suggest a sealant like Zaino Z2 or Werkstatt.
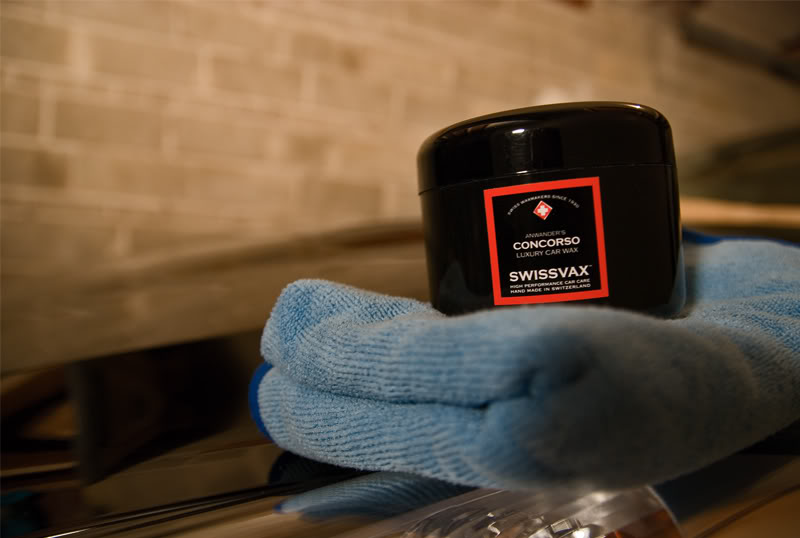
Your supposed to apply it by hand because it is heat activated but I just warm my applicator every panel(this stuff is not cheap you know).
I let the wax cure for about an hour or so, so in the mean time I did other things like polish the mufflers.
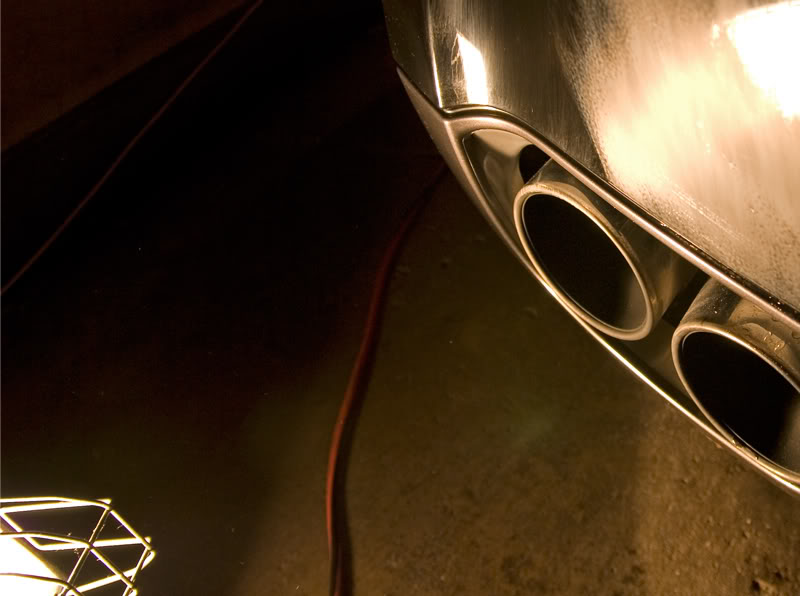
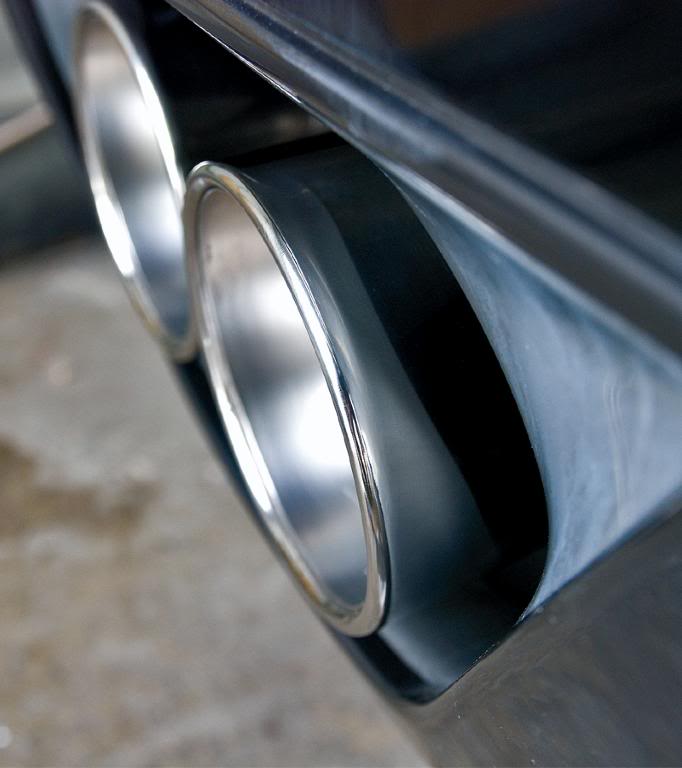
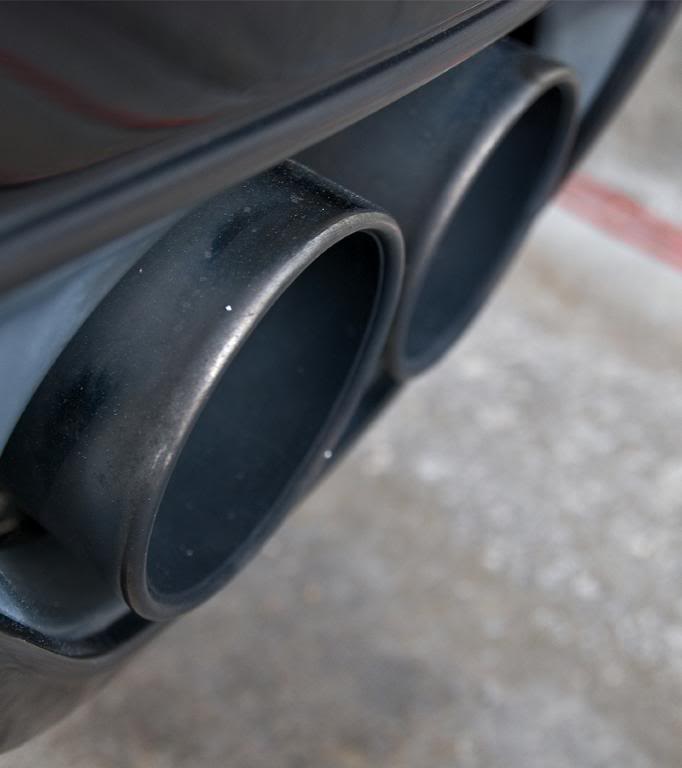
I did that with Meguiars Super Degreaser and 0000 steel wool to clean it up, then polished with Meguiars NXT All Metal polish. Here are some before and afters.
Before
After
Here is a closer look of the driver's side.
And the passenger's side.
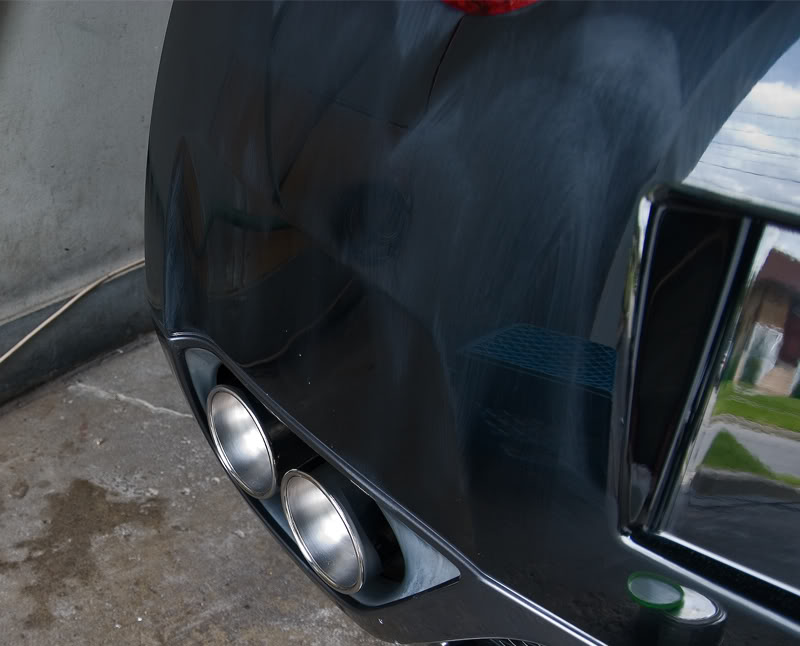
I also put Poor Boy's Wheel Sealant on the rims to protect against brake dust and also on the newly polished mufflers.
No pics but I applied Blackfire Long Lasting Tyre Gel to the tires.
After everything I finally wiped off the wax, sealant, and cleaned the windows.
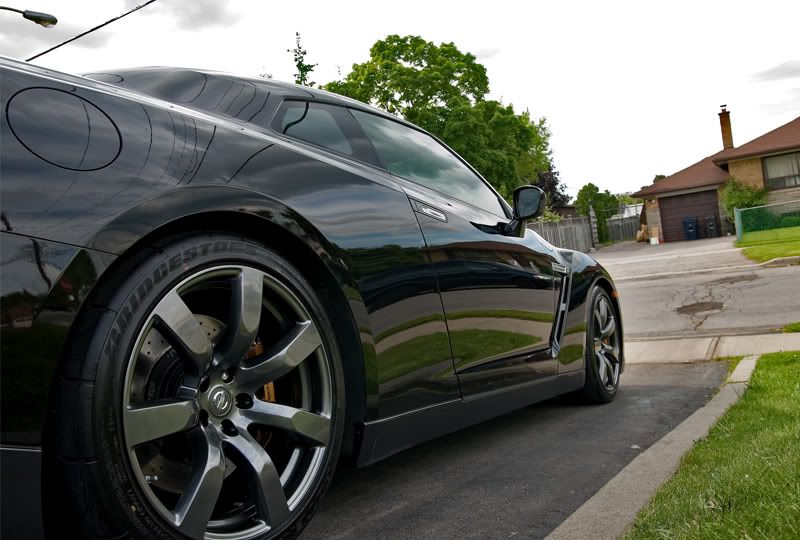
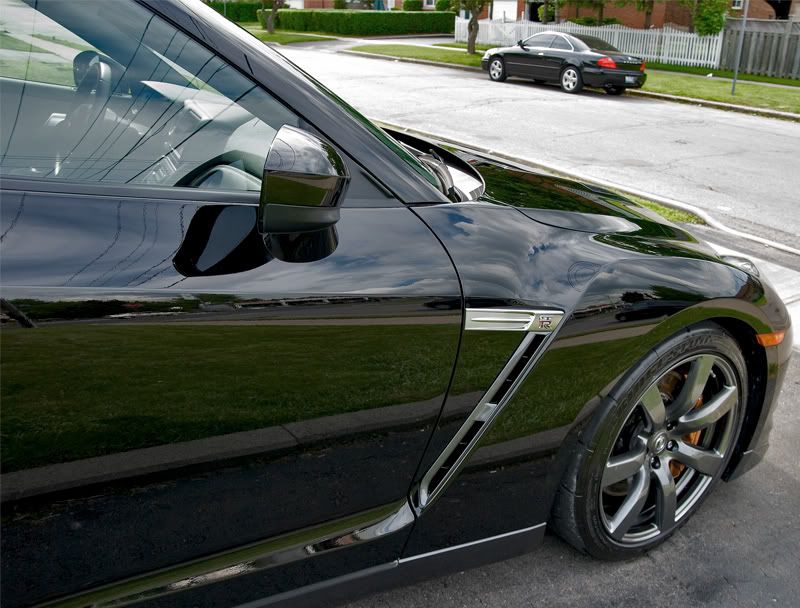
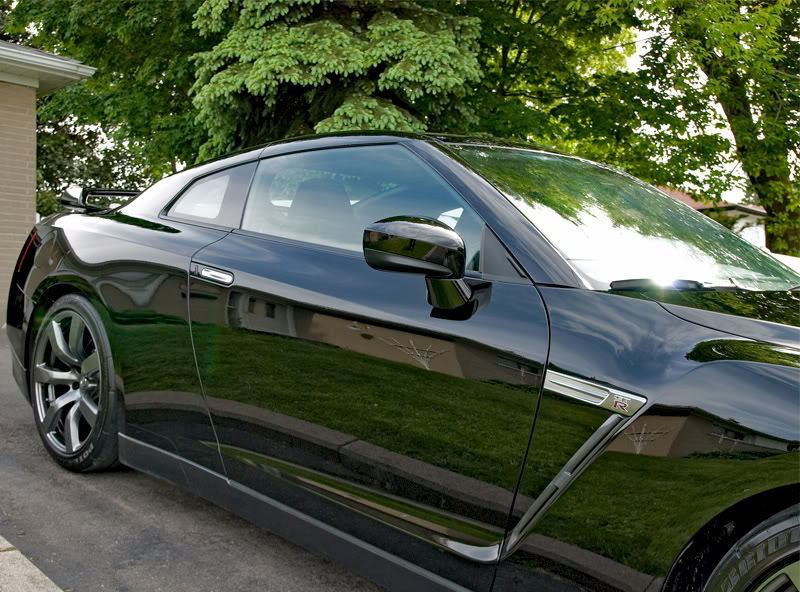
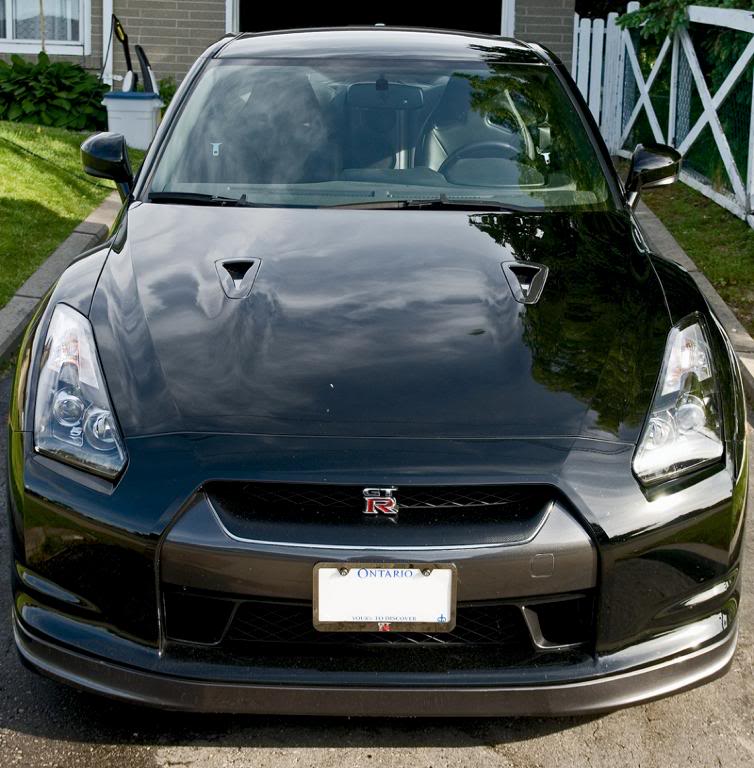
And now ladies and gentlemen.... the eye candy.
It was cloudy which was great and not so great cause the sun was playing hide seek but I was getting some beautiful cloud reflections.

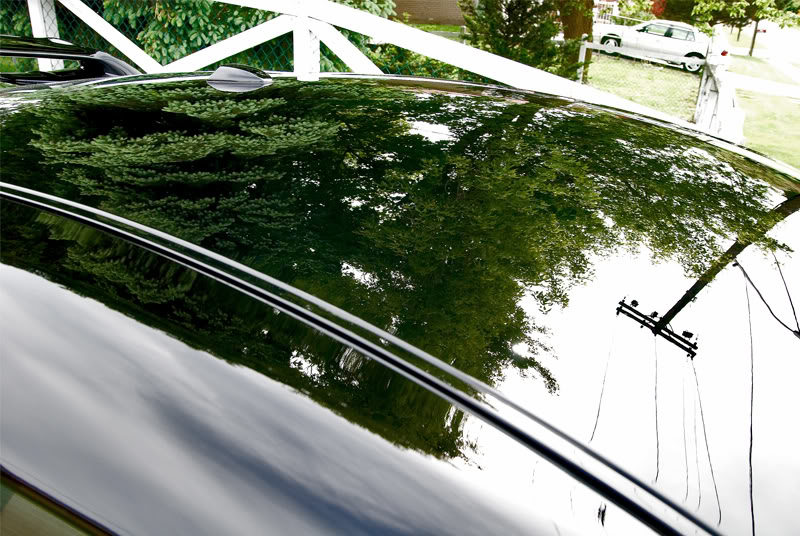
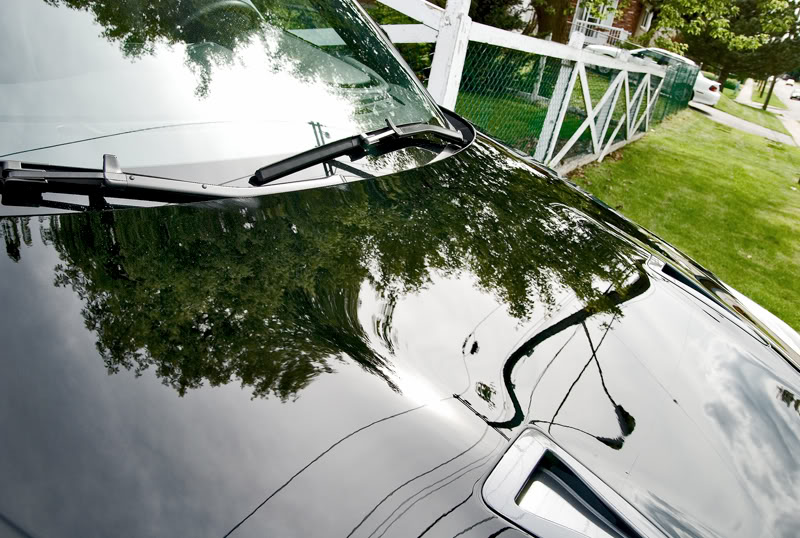
Tree reflection shot.
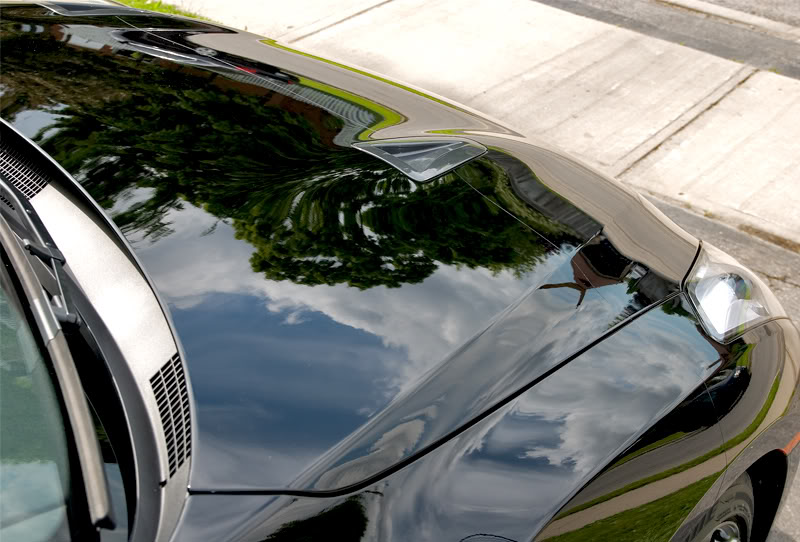
This pic is so cool!
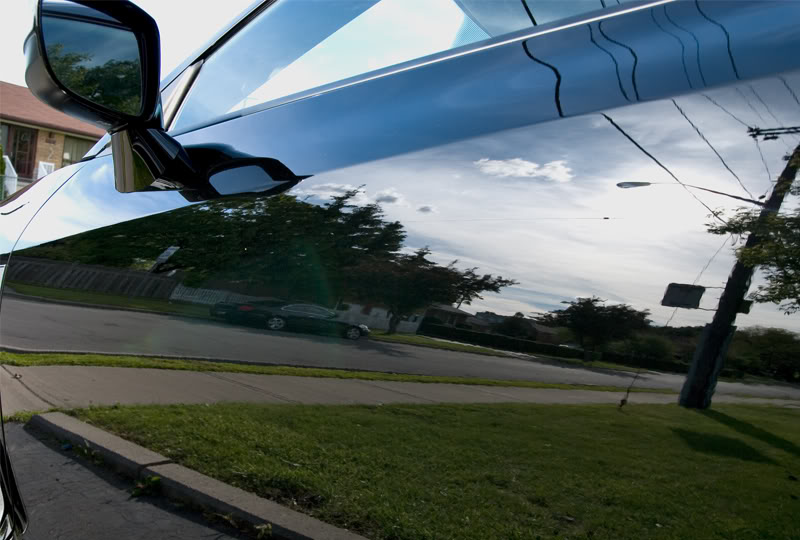
My signature reflection shot.

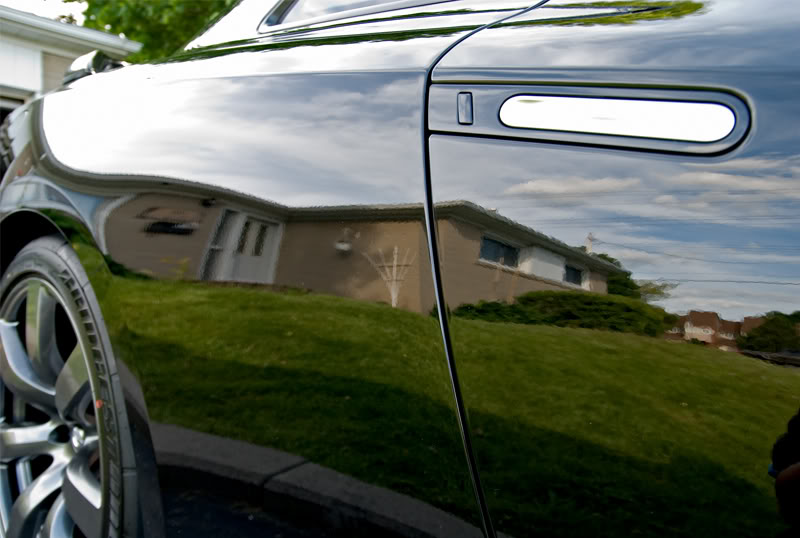
Another tree shot.
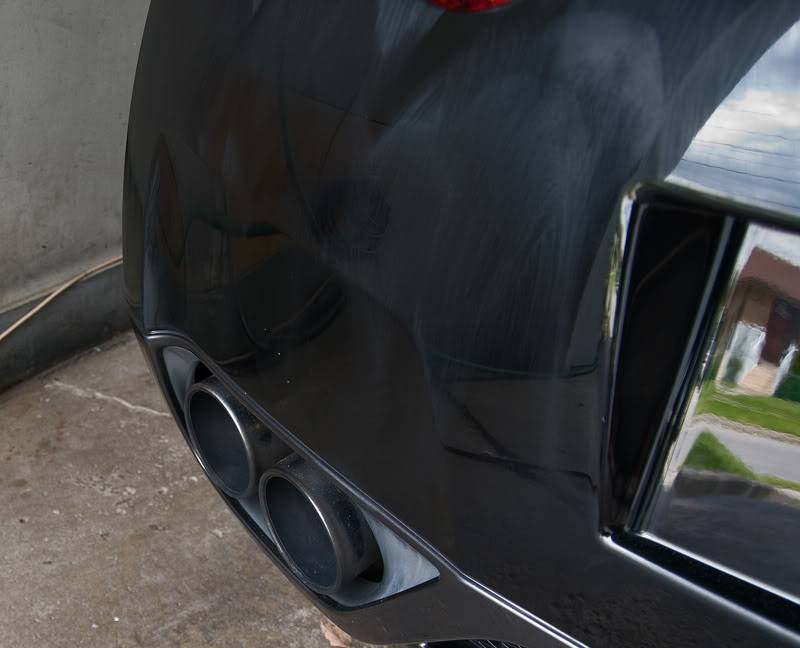
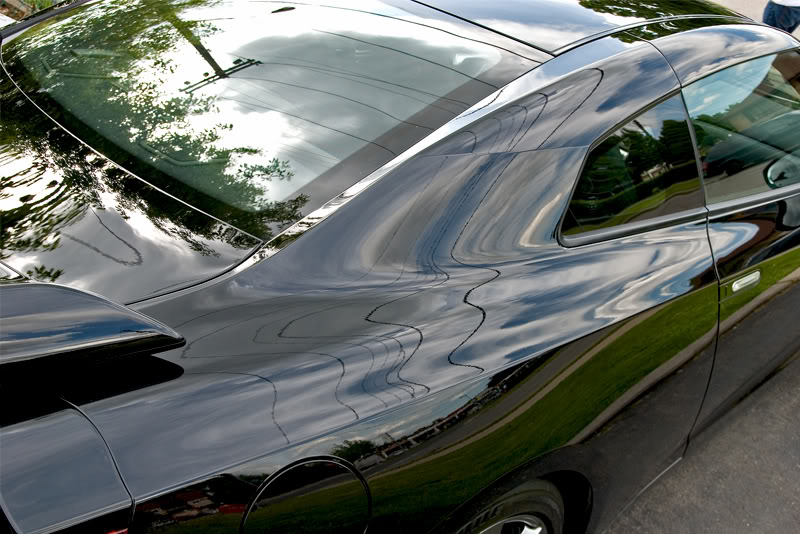
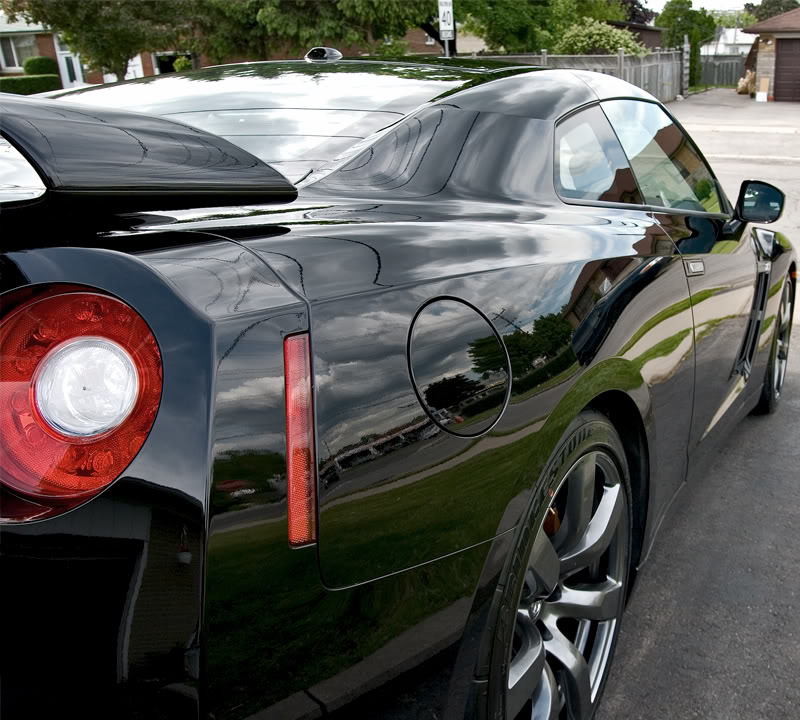
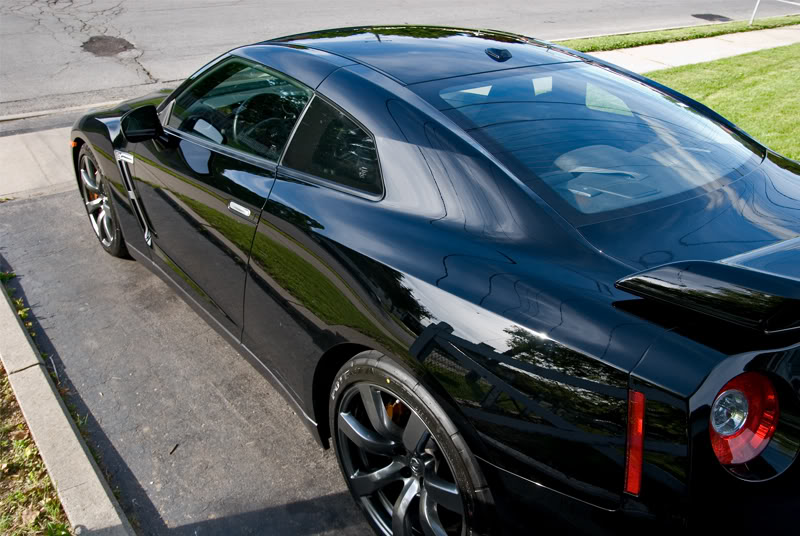
Gloss, clarity, shine, everything looking perfect.


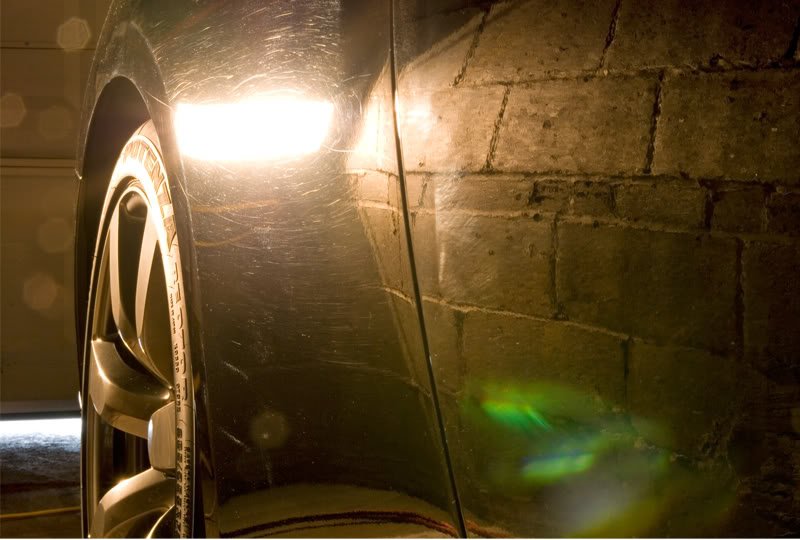
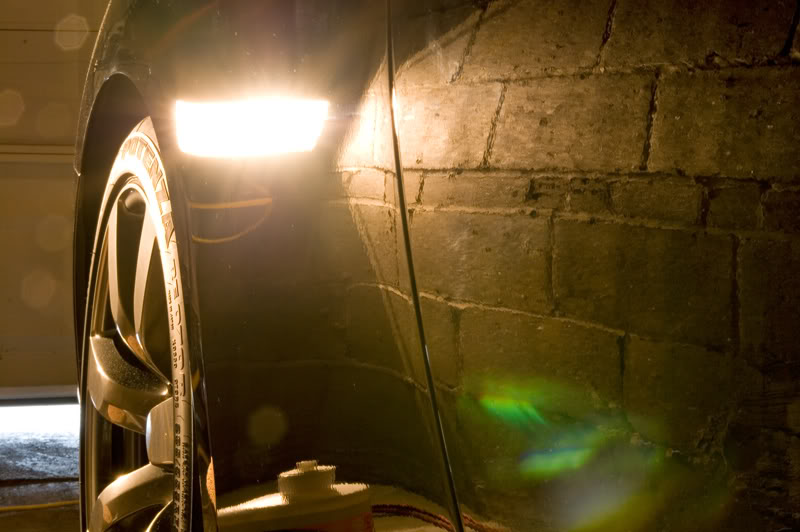
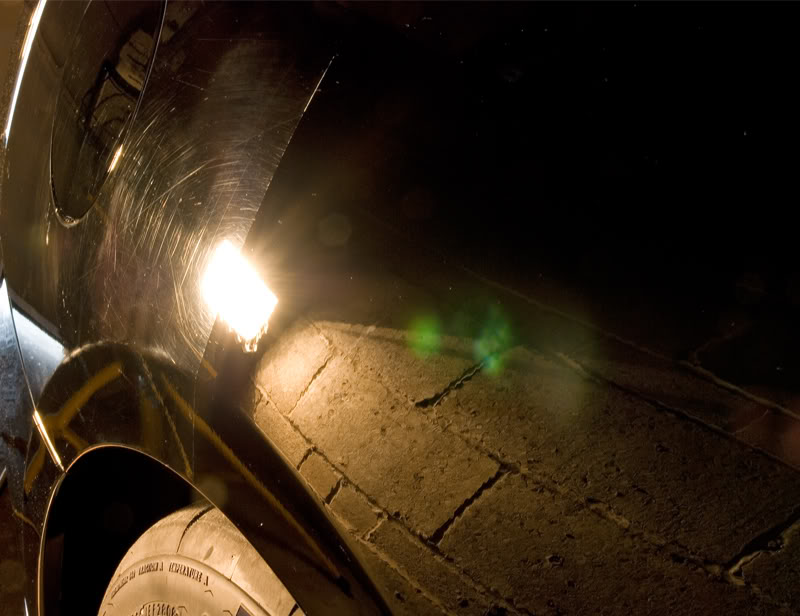
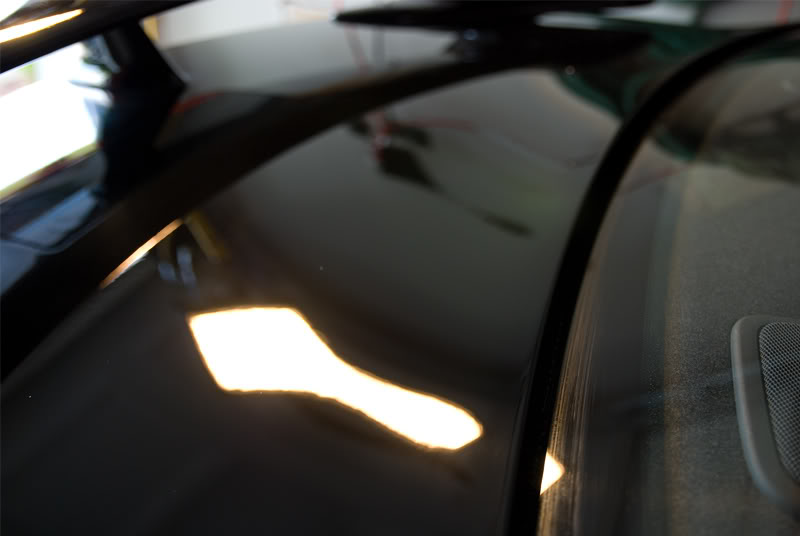
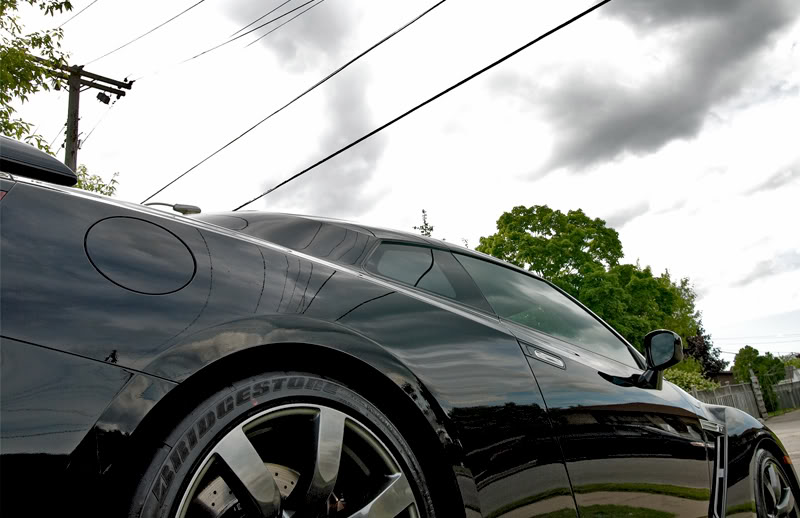
Sun came out for a bit so I raced around to get shots of the sun on the paint to show no swirls.
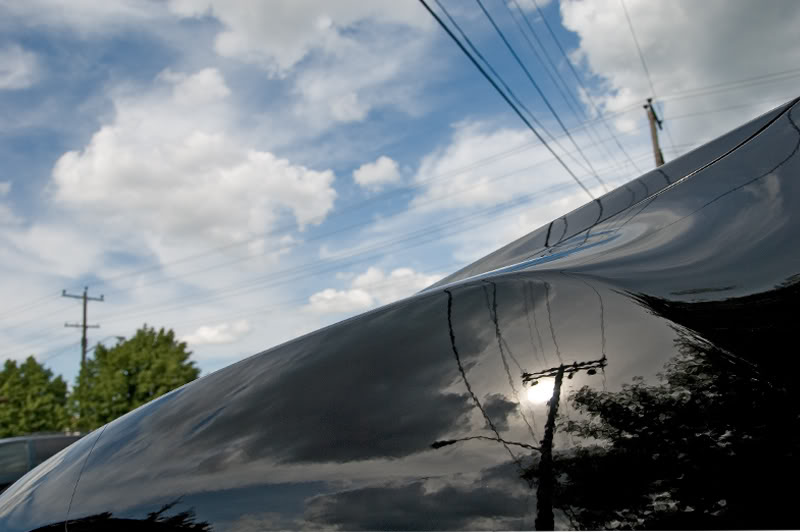
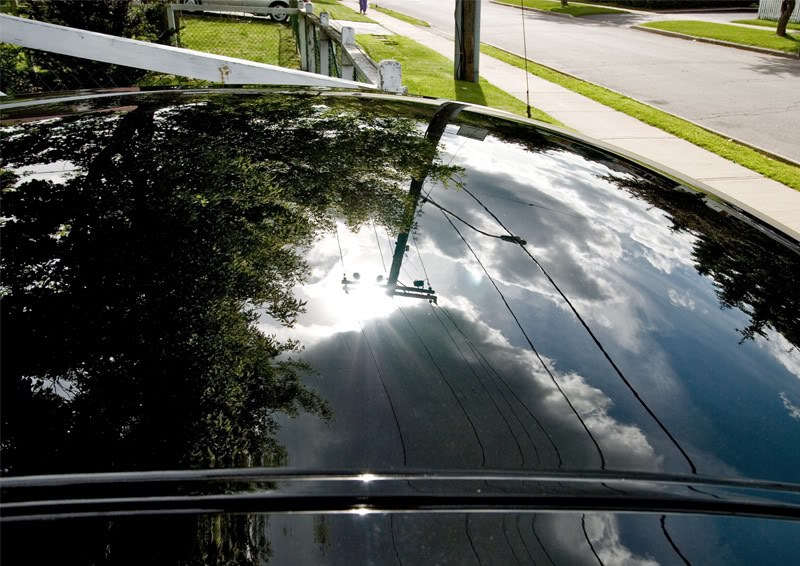
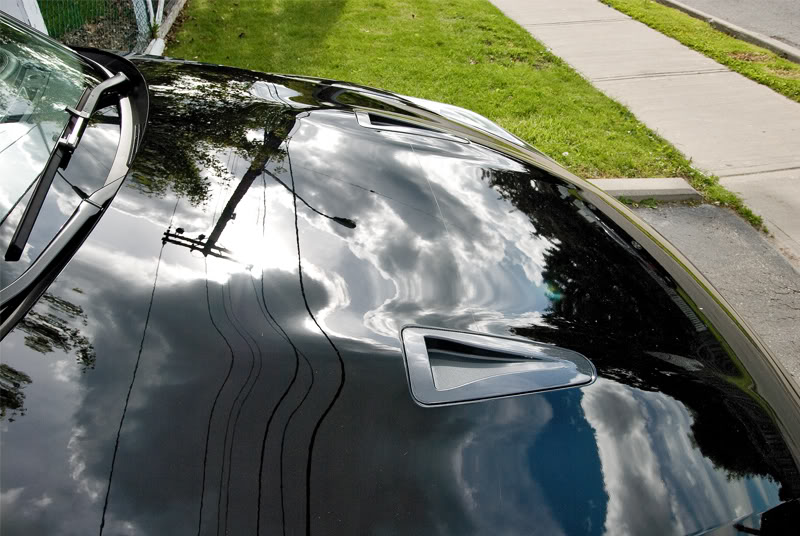
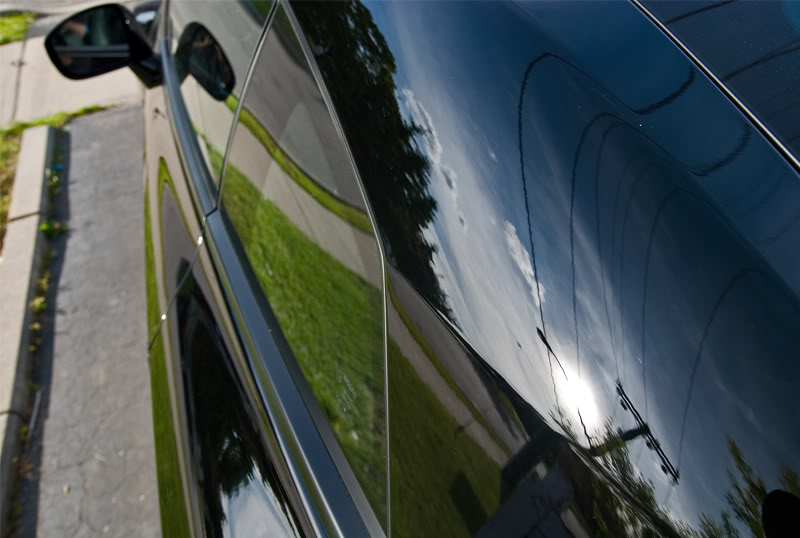
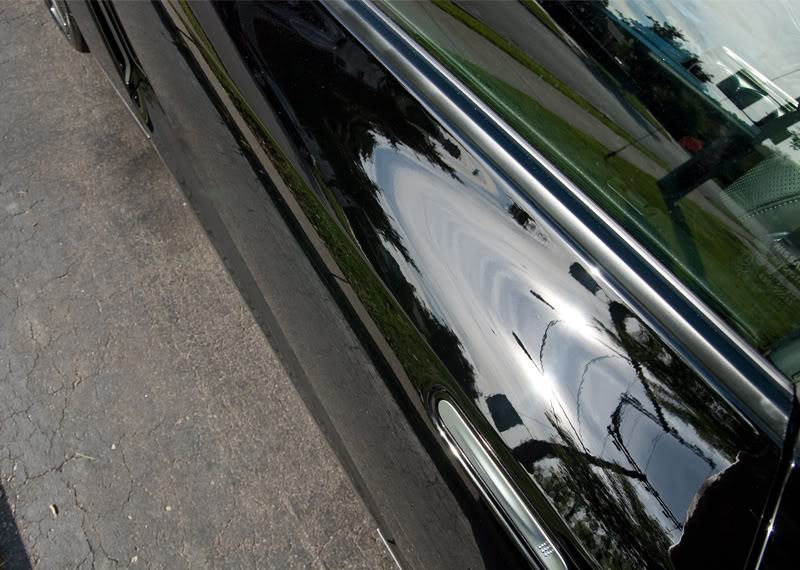
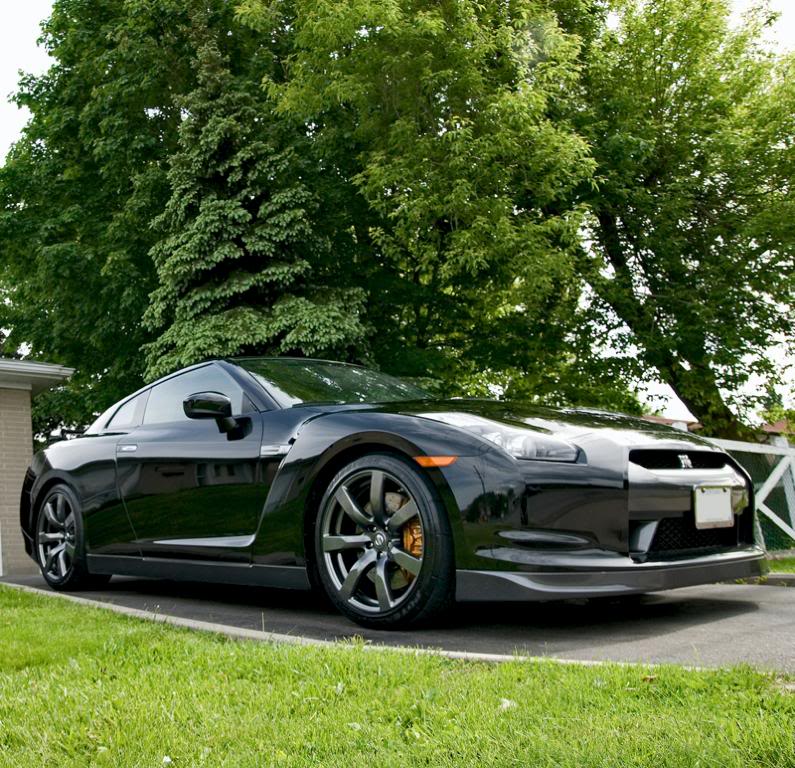
And finally my favorite shot.
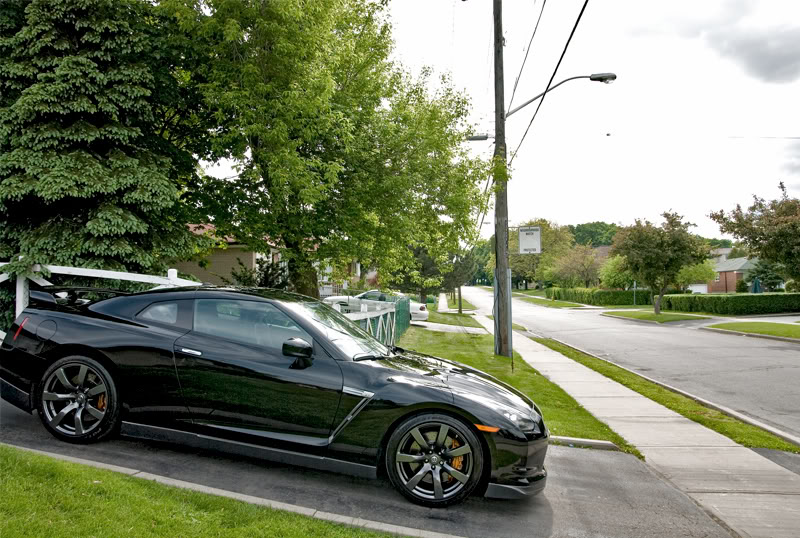
I also got to go for a little cruise around my block.
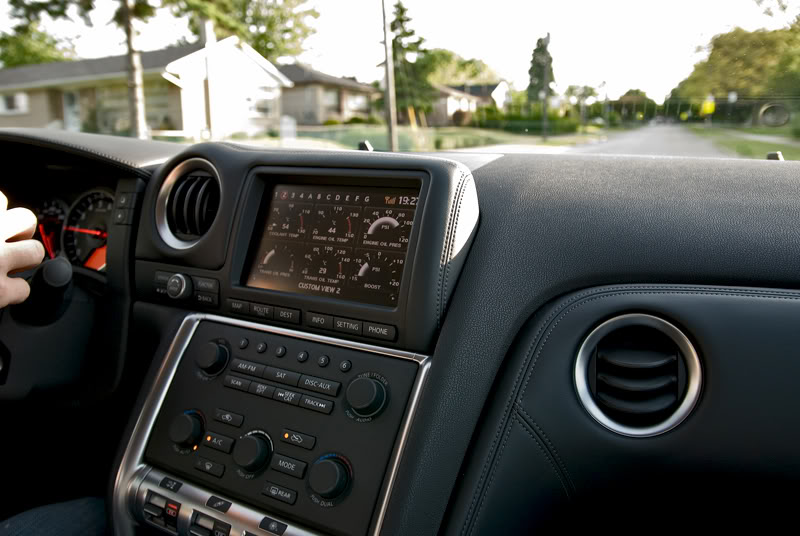
Got to feel some g-force go through my body and experience the torque and braking power.
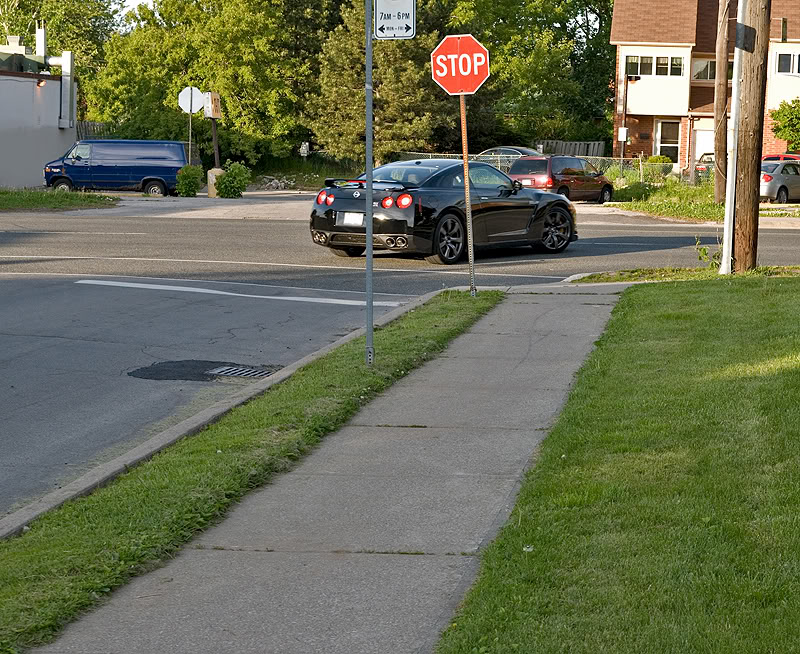
Dropped back home and there goes a shiny black GT-R.
Thank you very much to the owner for allowing to me to spend time with this awesome machine.
Hope you guys enjoyed the write up and any comments good, bad, or ugly are welcome.
Cheers!
Wes
So I was contacted initially for advice on how to deal with the swirls with the Porter Cable, Optimum Polishes, and some Lake Country Pads but along the conversation when I mentioned how long it would take we just decided that I would take it on. Problem now was it was gonna be a 2 week wait cause I was already booked up and the anticipation was killing me, I was really excited to spend time with godzilla.
Upon the GT-Rs arrival I had a chance to properly inspect the paint with my Sun Gun. At first in my mind I honestly thought that just a 1 step or 2 step polish at the most would be needed but taking a closer shocked look I realized that this was gonna need a full paint correction.
Anyway, here we go hopefully you guys enjoy the pics and possibly catch some tips.
Lets start with the basics. I don't approach a vehicle with anything on my clothing that could accidently scratch the car for example zippers, a belt buckle, watch, rings, etc.
Got in and backed it out.
And here she is.
My routine is to start with the wheels and engine generally because if you have already washed the car and then have to do either you will get the car dirty all over again.
Sprayed p21s Wheel Gel on the rims and tires. What's great about this wheel cleaner is it is non-acidic, meaning if you got ceramic brakes they won't damage them as say an acid based wheel cleaner would.
Let those soak and sprayed Meguiars All Purpose Cleaner cut 50/50 with water into the wheel well and let those sit and eat into the grime while I moved onto the engine.
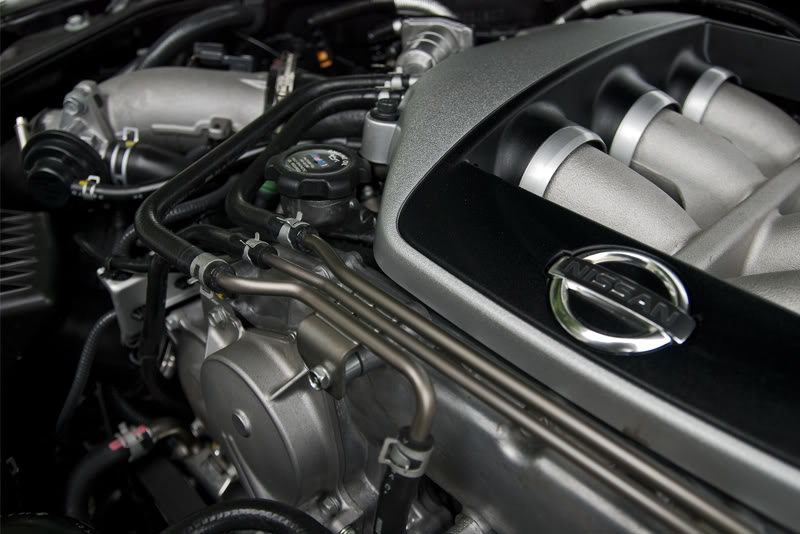
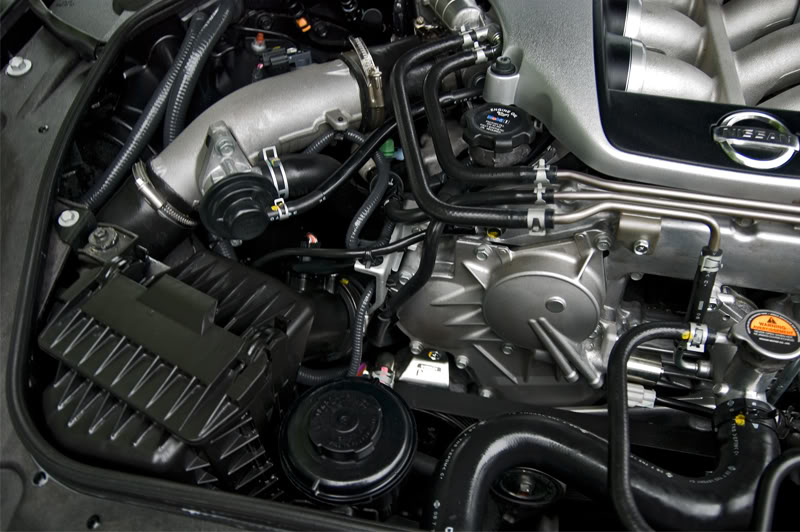
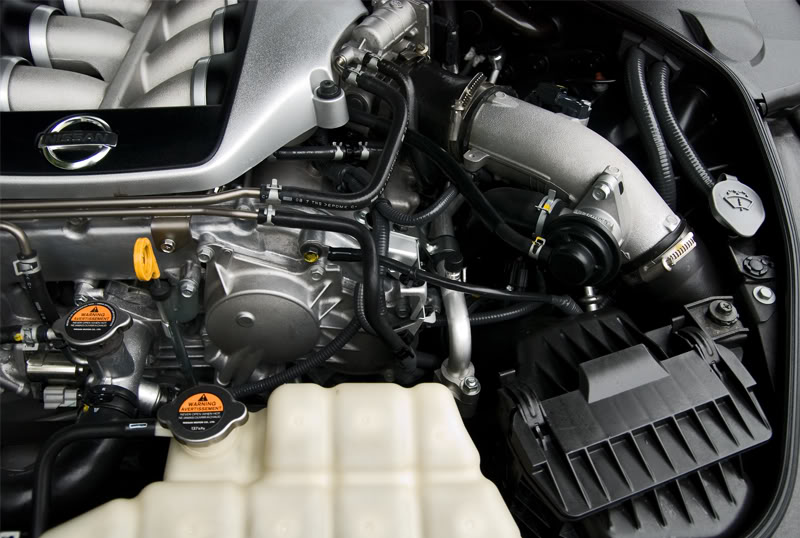
Engine was not to bad at all just dusty at the most so nothing hardcore here other then a Meguiars All Purpose Cleaner spray, light rinse off, a blow dry with my Chemical Guy's Blow Dryer, and then dressed it with Meguiars Hyper Dressing cut 25/75 water. Turned on the engine and let the engine warm up for about 10 minutes or so.
Before
After
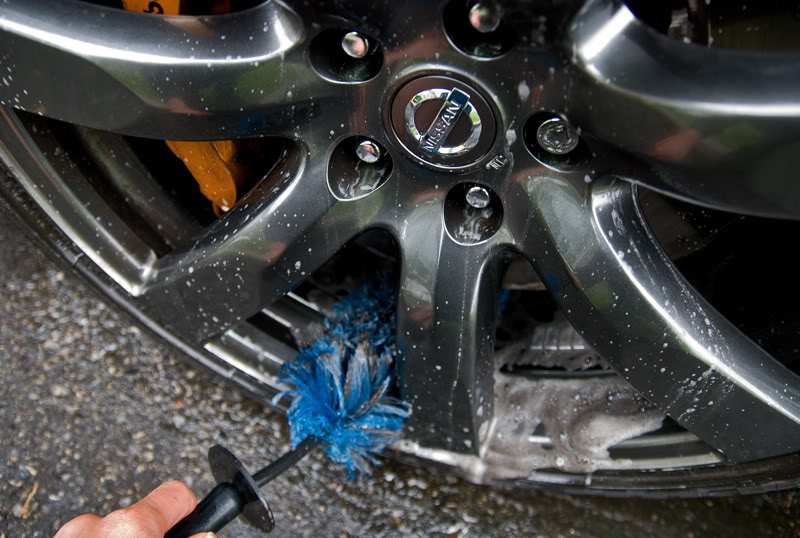
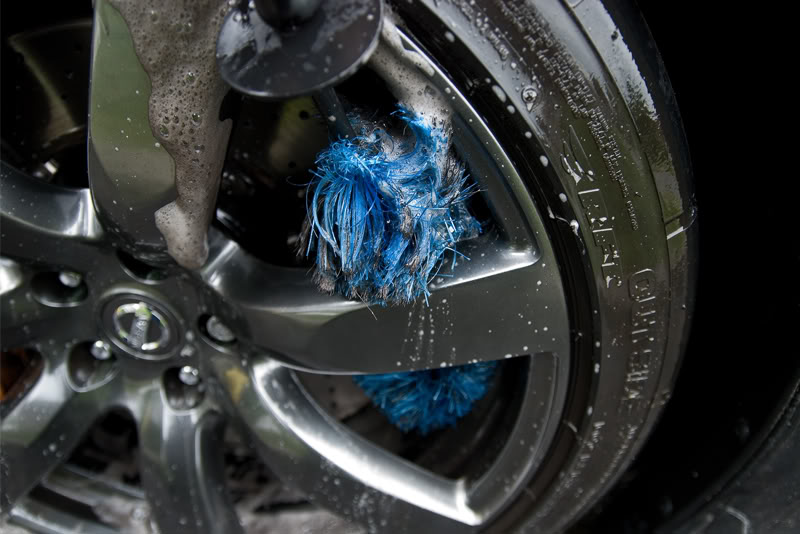
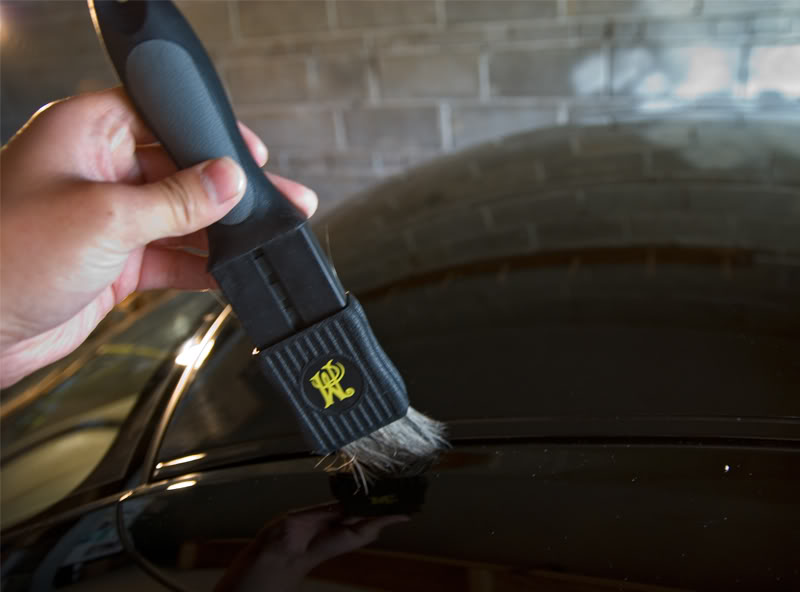
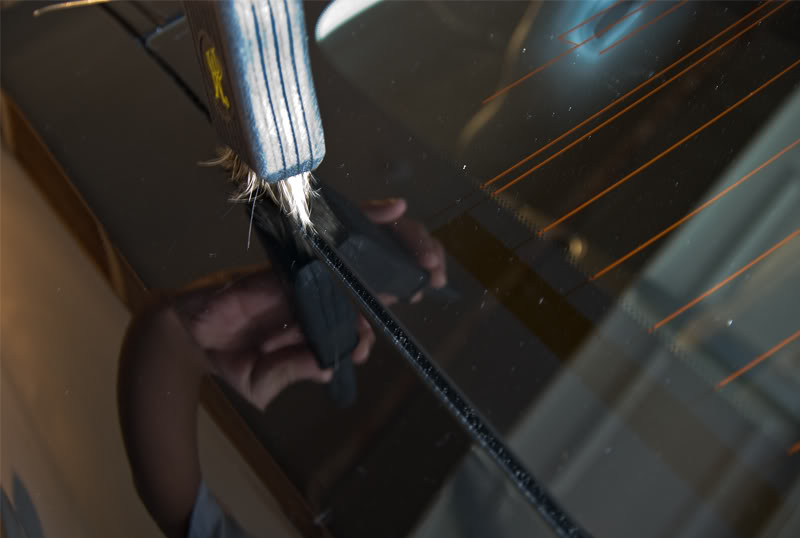
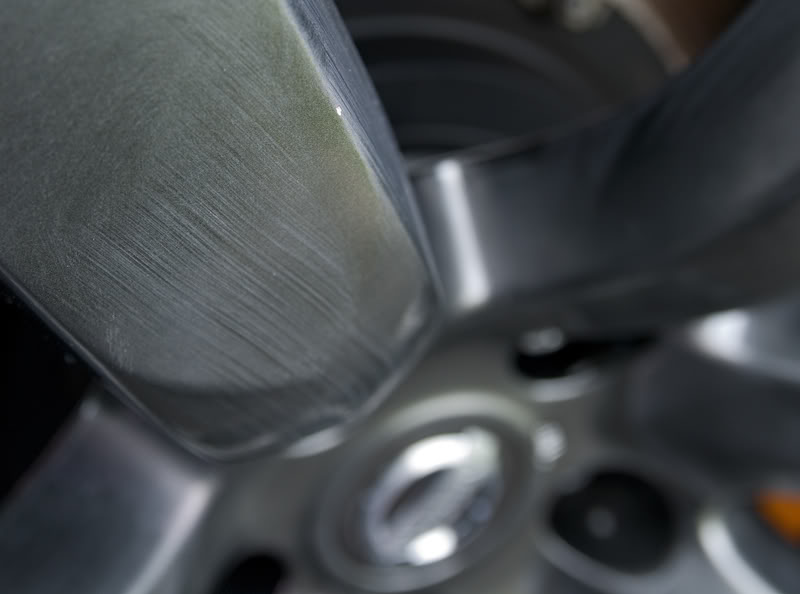
Now addressed the wheels with my E-Z Brush which is pretty cool cause it can be bent so that you can get it into different places. I really love the way these 2 pics with the E-Z Brush turned out!
Now this is what the rim should look like after using the brush properly.
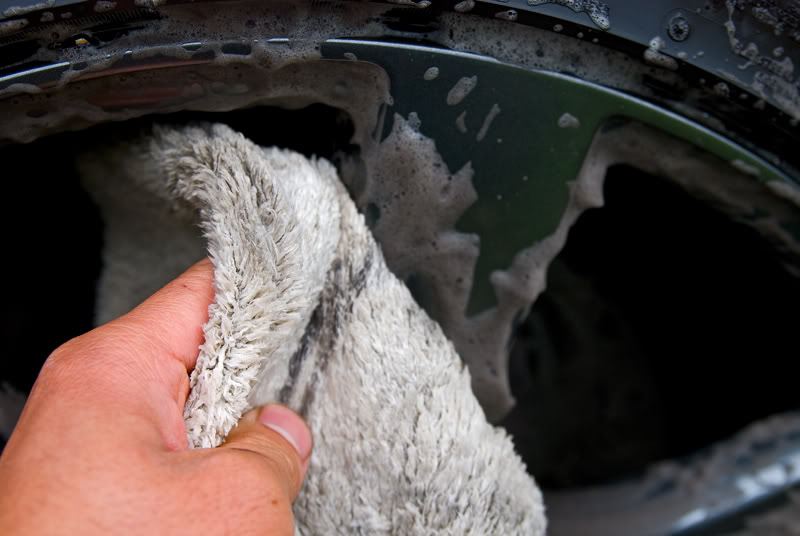
Did the rim face with a microfibre mitt solely dedicated for the rims, which I prefer cause on those stubborn spots I can really apply some hard pressure.
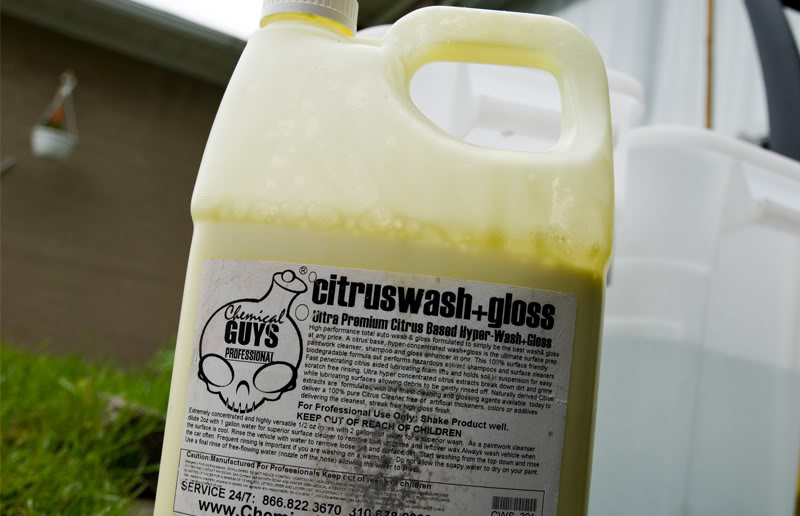
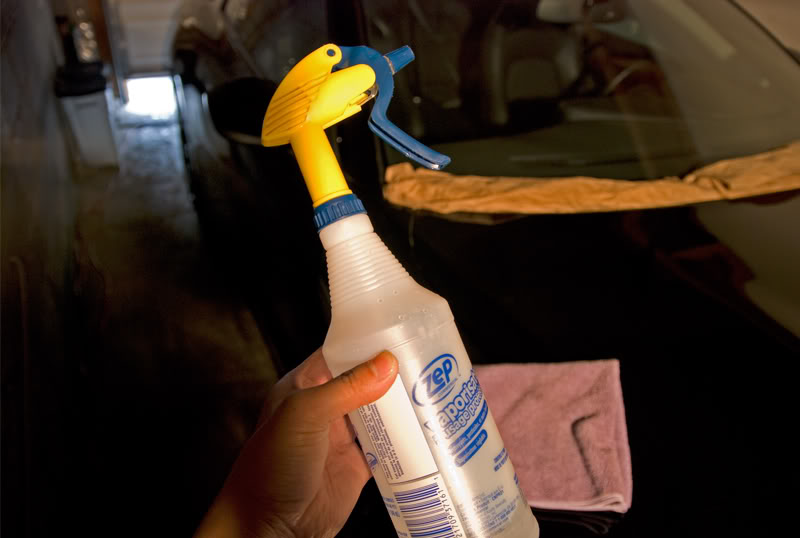
Finally after all of that on to the washing. Chemical Guys Citrus Wash + Gloss was the car soap cut to strip anything that may have been on the car's surface(wax), I forget the ratio to be honest.
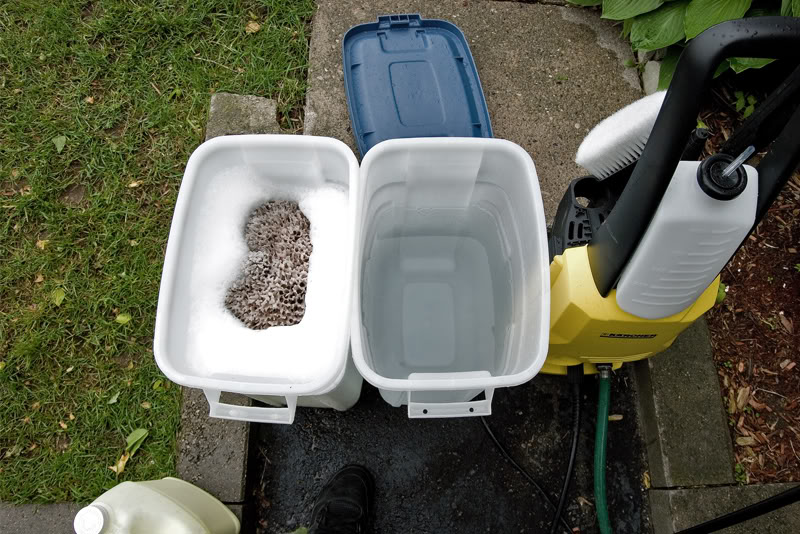
Two Bucket Method. One soapy water the other just water for rinsing so you don't contaminate the soapy water with dirt.
Started rinsing off the car to wash off as much as I could of any loose debris. Bottom line the less dirt on your car when you start washing means that there will be less dirt that may get potentially dragged on the paint causing swirls.
Sheepskin wash mitt this time starting with the roof.
After each panel or even half a panel you should be rinsing off your mitt in the water only bucket. The reason you do this is because you do not want to be using one bucket and dragging that same dirt filled water all over the paint causing swirls. Common sense and pretty simple no, but surprisingly people don't do it. Also you may have to rinse along as you go cause this will make washing a little longer.
Also forgive me for not being able to explain this next part it is just habit now already that I learnt years ago but hopefully someone can cover for me. All panels facing the sky should be done back and forth like in this pic hopefully you can see the pattern of the suds.
And all side panels should be up and down. The bottom half should be saved for last as usually those sections are the dirtiest.
Did the final rinse down and dried the car using a waffle weave towel. These towels are far superior to a chamois because of a couple things, they absorb water alot faster, they have these pockets which dirt or dust blown on the car can escape into and not be dragged on the paint, and I could go on and on but you get the point if you have or get one I am sure you can find more things to appreciate about them.
Finally finished. Some may think that shines nicely but I am not finished with this car yet.
Pulled it into my garage and got ready to clay with Riccardo Clay yellow.
My last bar.
Now if your planning on claying your own car without any polishing involved and it is not a mild clay like Sonus Green Clay, you are gonna get clay bar marring but general proper clay bar procedure is to avoid the cold. What you can do is have something with high lubricity like Megiuars Last Touch cut 50/50 with warm water to help you out but sometimes it just can't be avoided.
Oh yeah and the reason you clay is because even though you have washed your car there are still tiny debris that get embedded into your clearcoat called surface contaminants that only a clay bar can sheer out. If after you wash your car and run your hand along the paint you will notice that it still feels rough(even new cars that get rail dust from being transported by train) but after a good clay bar only a baby's skin feels more smooth then your paint, honestly.
Started claying and it was not bad at all as expected but as usual some lower parts on the door were a little bad and the whole back end had quite a bit.
Claying the hood.
Nothing really.
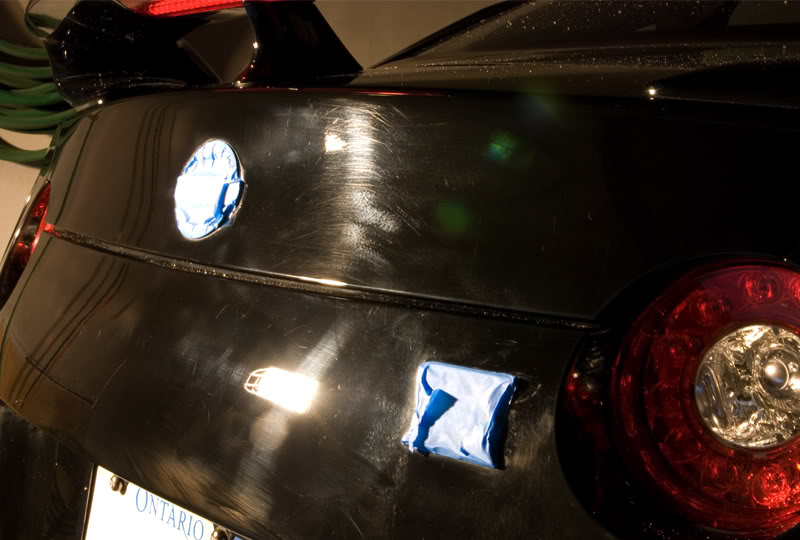
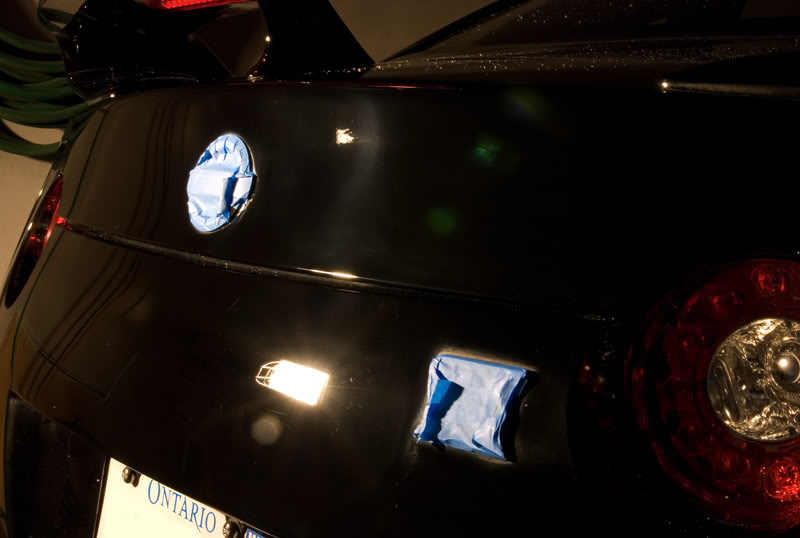
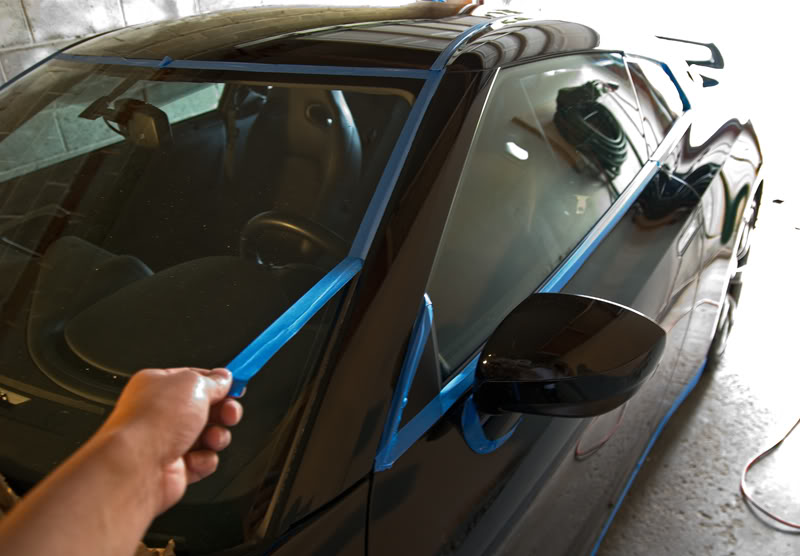
After the clay barring I want to mask the car with blue painters tape to protect rubber trim from being burnt. I like using two kinds of width.
It's 3M tape and the product number is 2090 which is medium adhesion, nothing to strong.
Here are some pics of the masking.
Put the thick tape over the edge of the clear bra.
And now time to measure the paint with a paint thickness gauge for any possible low spots and also to report to the owner if any panels have been repainted(I never thought anything would be repainted here though but just to look out for low spots).
Measured the paint in microns which is a thousandth of a millimeter or .001 of a mm. Generally in my experience OEM is 100 to 130 microns.
Measurements were looking healthy and very consistent around 140 more or less with maybe only 2 or 3 panels showing 130 or 150.
Even though I am only showing one measurement per panel what I am actually doing per panel is doing at least 10 more or less measurements. It's kind of weird but I kind of imagine the paint as a plain and imagine the different grooves of where it is high and low kind of like a field with hills.
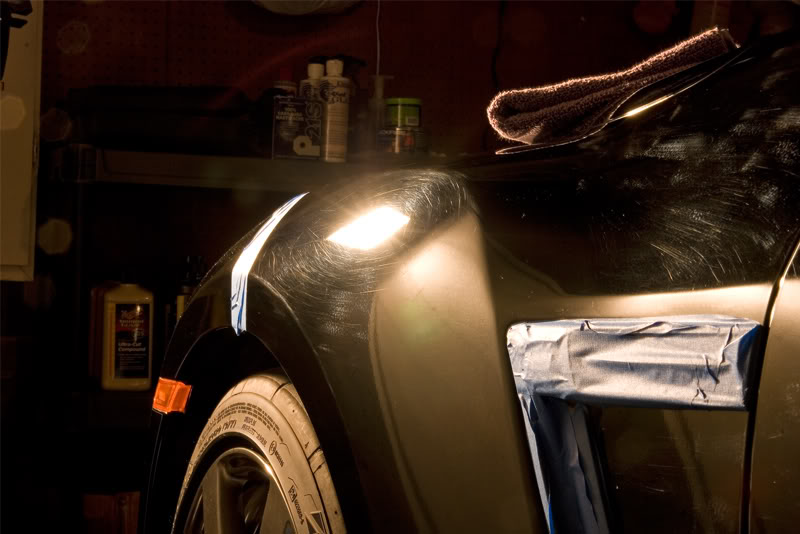
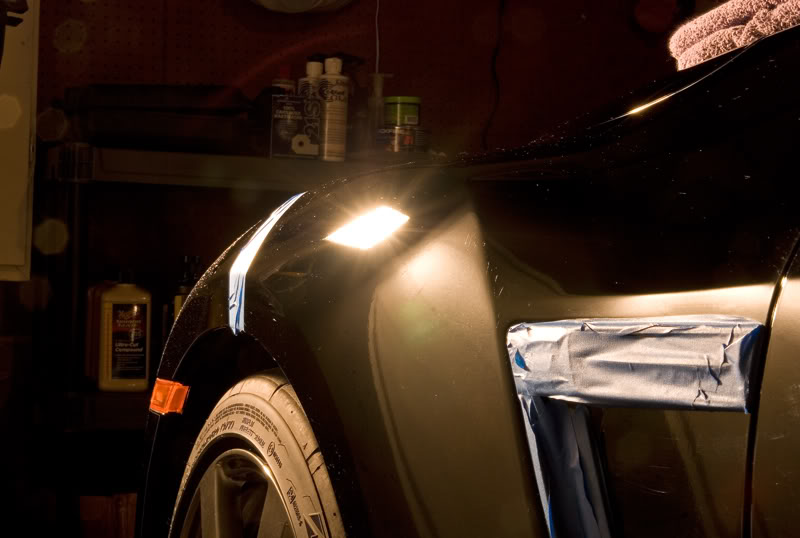
Anyway with all the prep work finally out of the way we can now begin polishing. Imagine and no disrespect to anyone but if you go to a hack shop they just wash your car and get straight into polishing, it's kind of scary especially if you prize your car and have to leave it in their hands what is happening to your baby.
So back to things here is what I was pretty much dealing with under 500 watt halogen lighting.
I went straight into it with Menzerna Super Intensive Polish, a 6.5 orange Lake Country Pad, the Meguiars Solo Backing Plate, and the Makita Rotary.
I used the Zenith Point Technique where 5 beads the size of a skittle were spread out at 600rpm, broken down at 1200rpm, then polished until clear at around 1700rpm. Then back down the scale from 1700rpm to 1500rpm, and then refined at around 1100rpm over a 12 x 18 area.
Here are some before and afters.
Before
After
A 50/50 shot with the right side polished and the left side not.
A shot of me polishing.
Before
After
Another 50/50
Before(this one was bad)
After
Before
After
Before(this one was pretty bad to)
After
Before
After
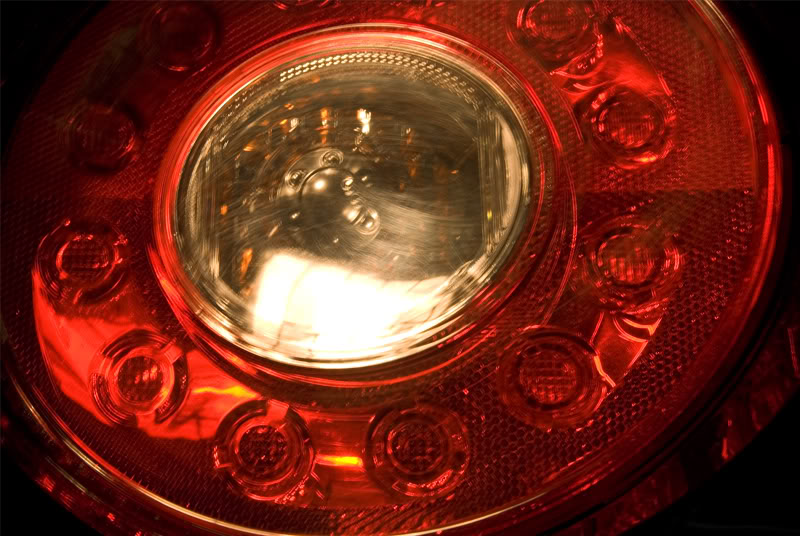
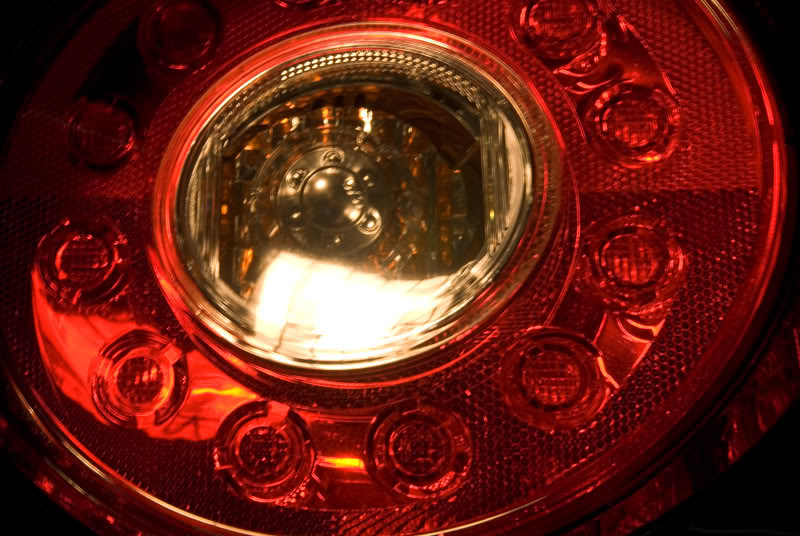
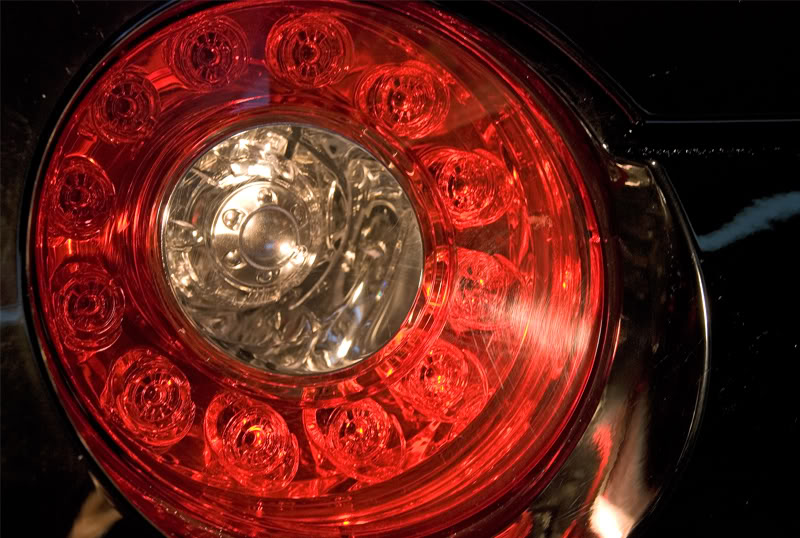
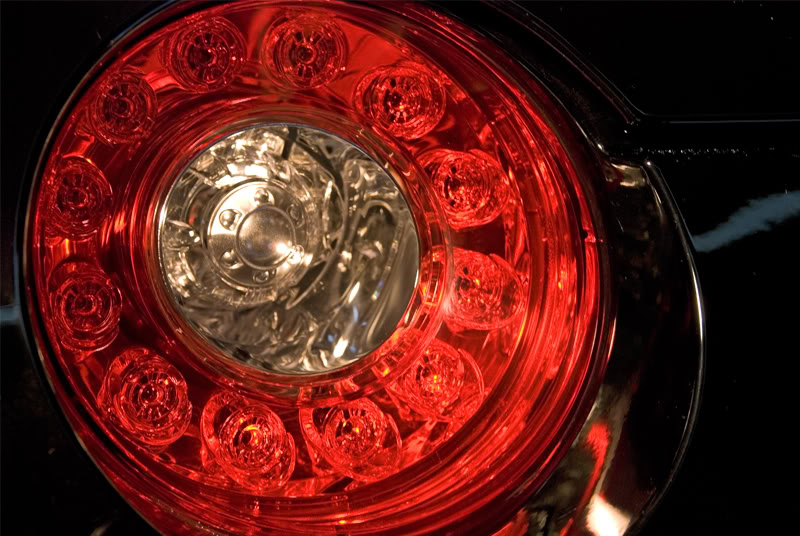
So after the cutting stage I also polished the tail lights as they had swirls on them as well but with a forced rotation dual action polisher(the new Flex 3401). Here are some before and afters.
Before
After
Before
After
Now after all that was said and done the hard part comes. Chasing all what is called rds or rids random deep scratches or random isolated deep scratches by wetsanding. Now just a 2 step polish will get the paint in the 95% range more or less perfected(which is in my opinion perfectly fine for a daily driver) but deeper stuff will be left behind. How deep the scratches are varies some you can feel with your nail others you can't but with spot wetsanding you can either get them out completely or at the least round off the edges so that the sunlight is dispersed in a way to not make them so noticeable or not noticeable at all even though they may be there.
Now excuse me please because 1 this was very labour intensive and 2 my photography skills are not on a level to capture these fine scratches.
The process was to wetsand with either 2000 or 2500 grit then cross hatch sand with 3000 grit. Basically when you sand with either 2000 or 2500 grit you sand in the motion vertically then go back over with 3000 and go horizontally to cross hatch making polishing out the wetsanding marks easier.
Here is a rid.
Wetsanding it out.
And gone.
Here are some during shots. I honestly just wanted to get it done and spent a good couple hours going through this process.
Now with that tedious stage done I could finally jewel the paint, but first a couple things.
Unmask
Dust out the crevices.
And finally an alcohol wipe down. The reason you do this is because the polishes contain oils that can fill very very light scratches so the wipe down allows you to properly check your work.
So alcohol cut 50/50 with water wiped on with a plush microfibre cloth, and a 3M Sun Gun were used to check my work.
The Sun Gun for those that don't know omits they same spectrum light as the sun and I believe is 99.3% similar. There are some reflections in the paint that may seem like something but are not.
Finally the last stage of polishing which is the jeweling or burnishing stage which is a very light cutting polish and light cutting pad which burnish the paint to a very high gloss(they don't do this at the factory).
Tools for this job were my new Flex 3401 which I have been dying to use and this is the first time, Menzerna P085RD, and a white Lake Country pad.
A during shot.
Some amazing reflection shots!
Look at the gloss and there isn't even a wax on yet.
After spending a couple hours refining the paint another alcohol wipe down was done not only to inspect for defects but to also create a clean surface for the wax to bond to.
Wax of the day was Swissvax Concorso. For dark colors a carnuba based wax gives on amazing glow but for light colored cars I suggest a sealant like Zaino Z2 or Werkstatt.
Your supposed to apply it by hand because it is heat activated but I just warm my applicator every panel(this stuff is not cheap you know).
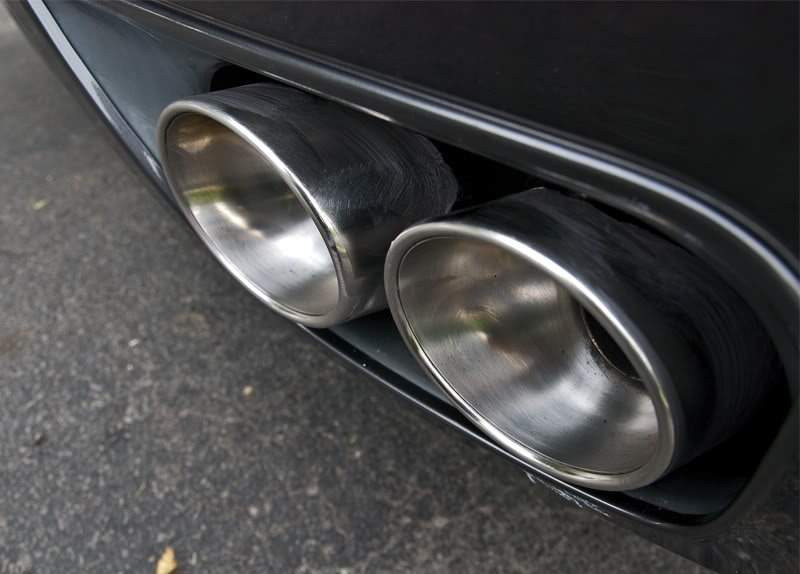
I let the wax cure for about an hour or so, so in the mean time I did other things like polish the mufflers.
I did that with Meguiars Super Degreaser and 0000 steel wool to clean it up, then polished with Meguiars NXT All Metal polish. Here are some before and afters.
Before
After
Here is a closer look of the driver's side.
And the passenger's side.
I also put Poor Boy's Wheel Sealant on the rims to protect against brake dust and also on the newly polished mufflers.
No pics but I applied Blackfire Long Lasting Tyre Gel to the tires.
After everything I finally wiped off the wax, sealant, and cleaned the windows.
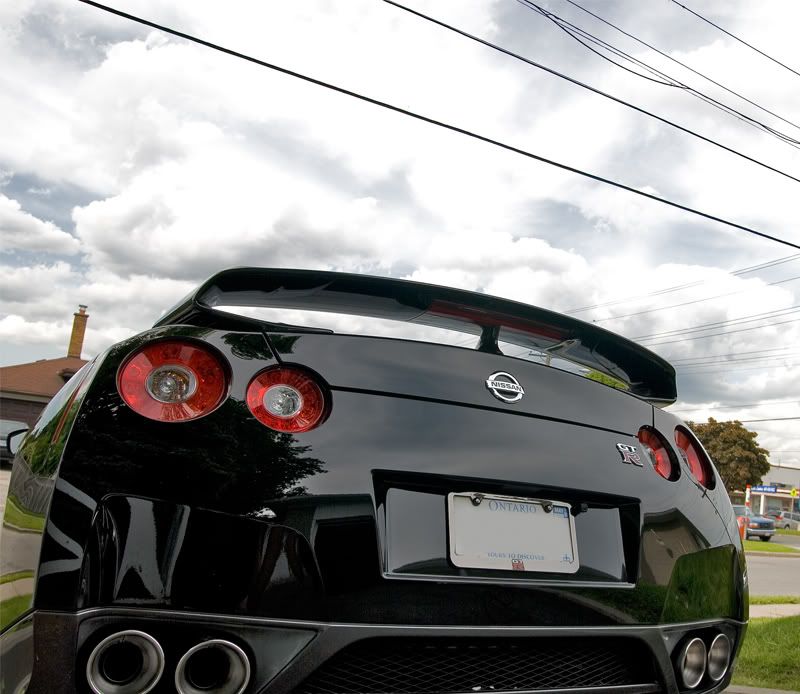
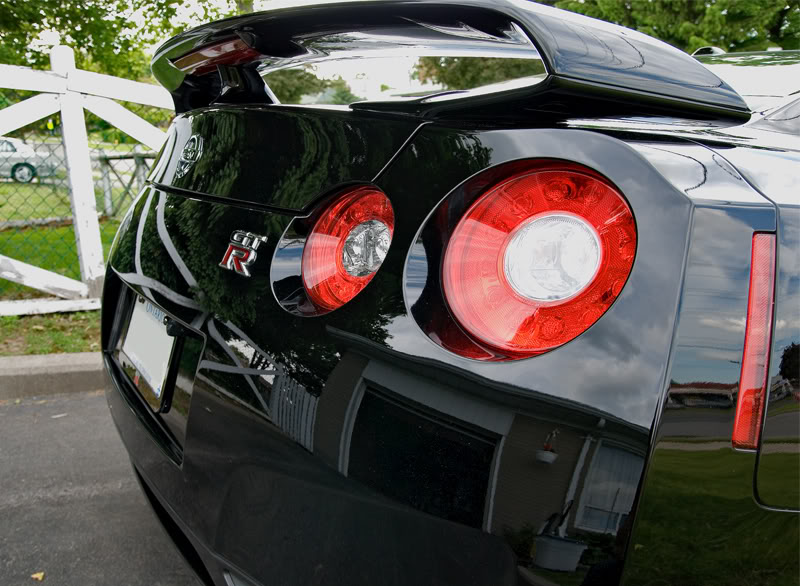
And now ladies and gentlemen.... the eye candy.
It was cloudy which was great and not so great cause the sun was playing hide seek but I was getting some beautiful cloud reflections.
Tree reflection shot.
This pic is so cool!
My signature reflection shot.
Another tree shot.
Gloss, clarity, shine, everything looking perfect.
Sun came out for a bit so I raced around to get shots of the sun on the paint to show no swirls.
And finally my favorite shot.
I also got to go for a little cruise around my block.
Got to feel some g-force go through my body and experience the torque and braking power.
Dropped back home and there goes a shiny black GT-R.
Thank you very much to the owner for allowing to me to spend time with this awesome machine.
Hope you guys enjoyed the write up and any comments good, bad, or ugly are welcome.
Cheers!
Wes


Thread
Thread Starter
Forum
Replies
Last Post
judge dredd
West Region
1
Feb 17, 2014 11:33 PM
judge dredd
West Region
0
Oct 7, 2013 11:47 PM
judge dredd
West Region
0
Jun 4, 2013 11:53 PM
judge dredd
West Region
0
Mar 1, 2013 12:39 AM
Currently Active Users Viewing This Thread: 103 (0 members and 103 guests)